Disclaimer:
The information provided on this blog is for educational purposes only. The use of hacking tools discussed here is at your own risk.
For the full disclaimer, please click here.
Introduction
Certspotter stands as the original authority in certificate transparency log monitoring—a mouthful, indeed. Let’s dissect why you, as a hacker, should pay attention to it.
One of your primary maneuvers when targeting a system is reconnaissance, particularly passive reconnaissance. Unlike active reconnaissance, which directly engages the target, passive recon operates discreetly.
Passive recon involves employing tactics that evade triggering any alerts from the target. For instance, conducting a Google search about your target doesn’t tip them off. While technically they might detect someone from your area or country searching for them via Search Console, using a VPN and a private browser can easily circumvent this.
You can even explore their entire website using Google cache (just search for cache:your-target.com) or archive.org without exposing your IP or intentions to them. On the other hand, active recon tends to be more assertive, such as port scanning, which leaves traces in the target’s logs. Depending on their security measures and level of vigilance, they might notice and decide to block you.
If you were to scan my public IP, I’d promptly block you 😃.
But I digress. What if you could continuously and passively monitor your target for new subdomains, project developments, systems, or any other endeavors that require a certificate? Imagine being alerted right as they register it.
Now, you might wonder, “How much will that cost me?” Surprisingly, nothing but the electricity to power your server or whatever charges your cloud provider levies. With Certspotter, you can scrutinize every certificate issued to your target’s domains and subdomains.
What mischief can I stir?
Your mind is probably already concocting schemes, so here’s a scenario to fuel your imagination:
Imagine your target sets up a WordPress site requiring an admin password upon the first visit. You could swoop in ahead of them, seizing control of their server. (Sure, they might reinstall, but it’ll definitely ruffle their feathers 😏).
A bit sneakier? How about adding a covert admin account to a fresh Grafana or Jenkins installation, which might still be using default credentials upon release. Truly, you never know what you might uncover.
Setting up Certspotter
To begin, you’ll need a fresh Debian-based Linux distro. I’ll opt for Kali to simplify later use of other hacking tools. Alternatively, you can choose any Linux distribution to keep your image size compact.
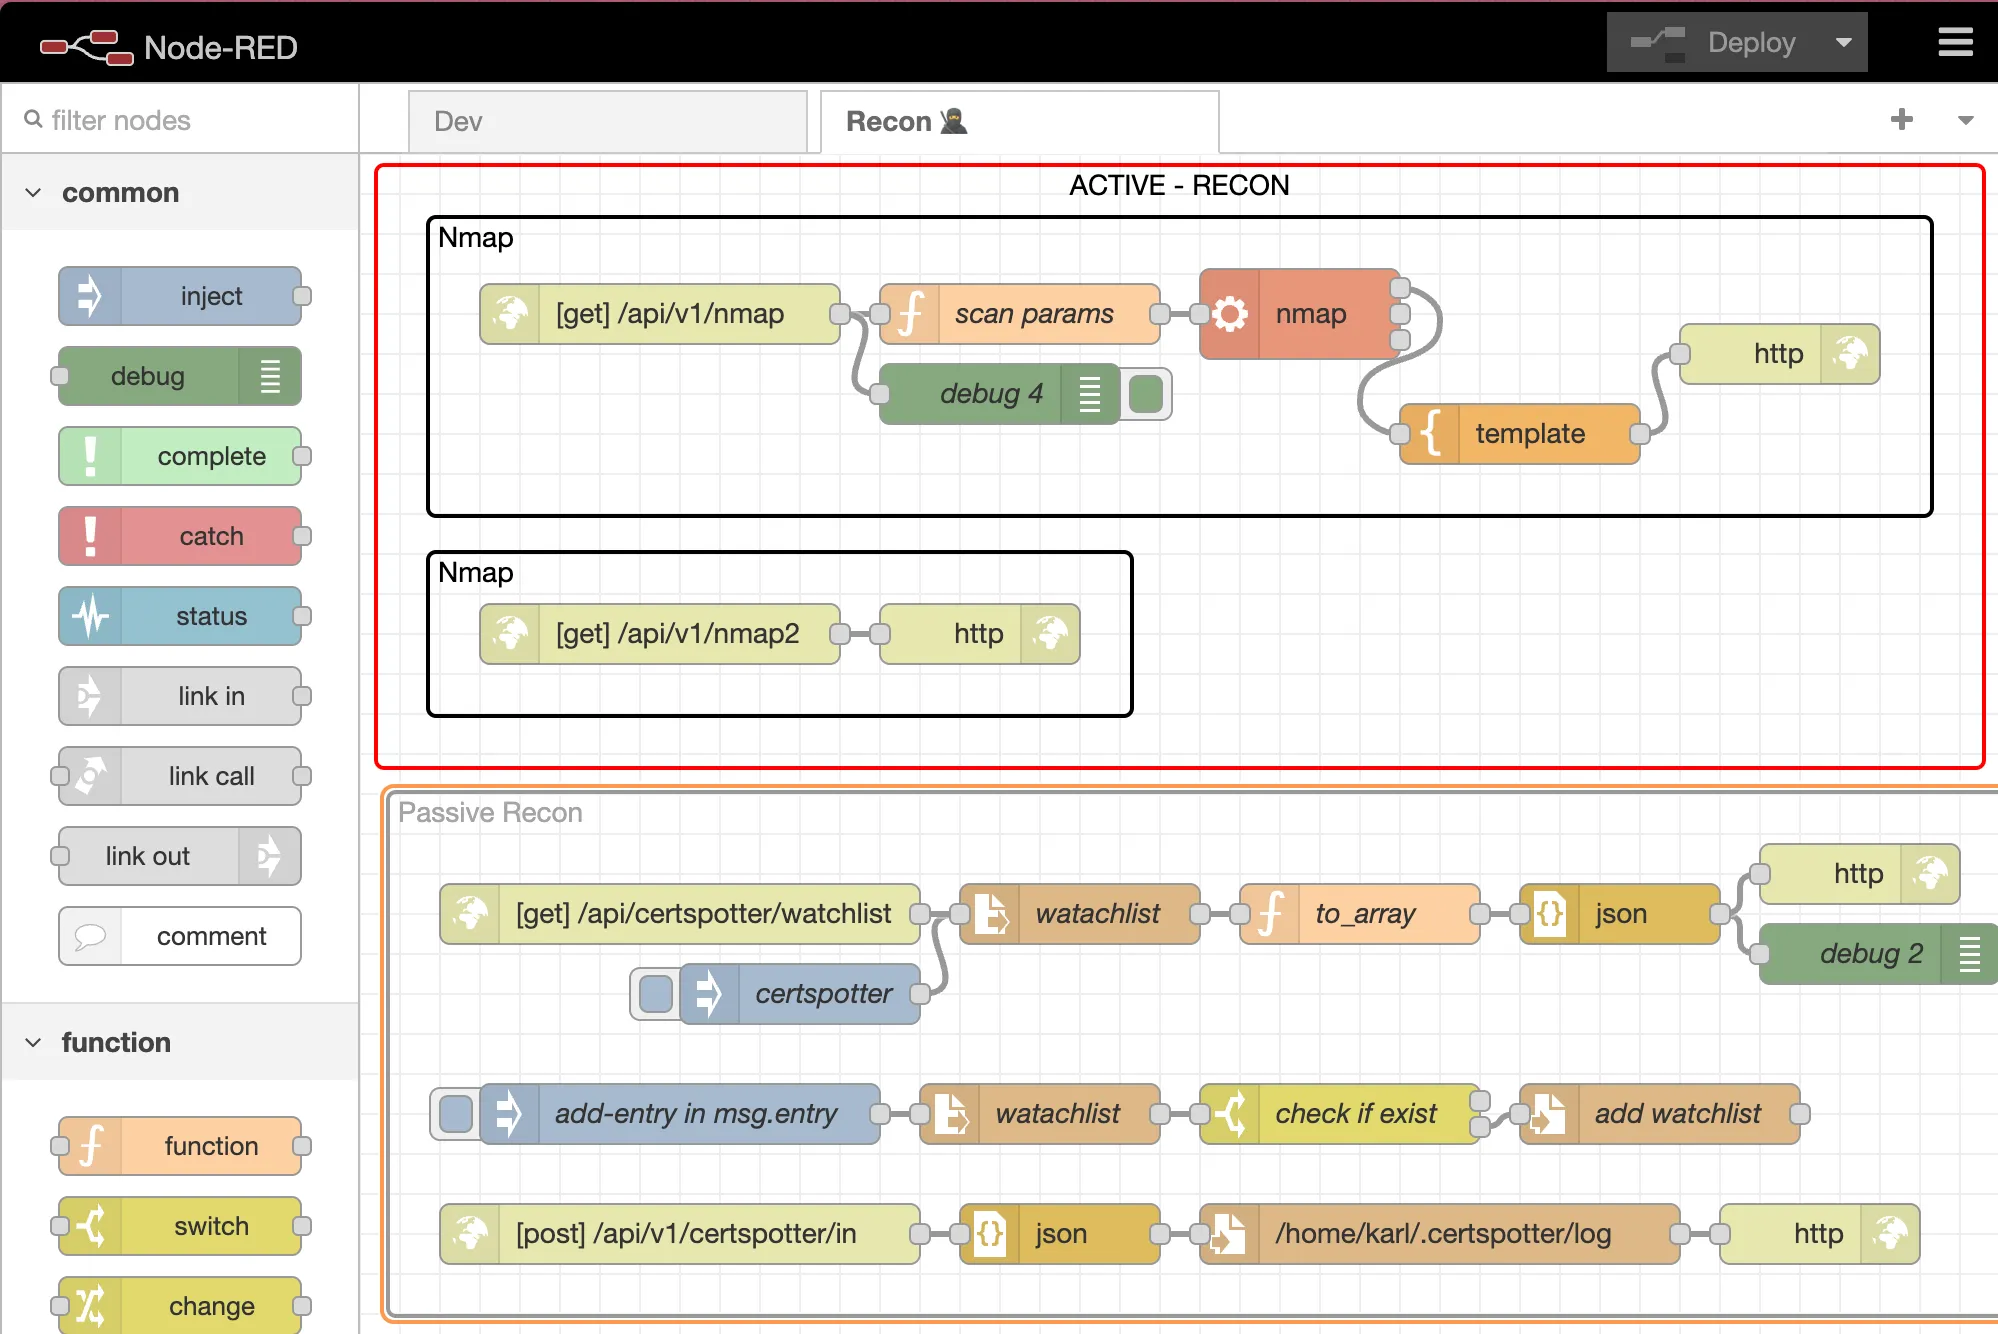
Certspotter
Start by visiting their Certspotter GitHub. I strongly advise thoroughly reading their documentation to acquaint yourself with the tool.
Installation:
go install software.sslmate.com/src/certspotter/cmd/certspotter@latestNext, create directories:
mkdir $HOME/.certspotter
mkdir $HOME/.certspotter/hooks.d # scripts
touch $HOME/.certspotter/watchlist # targets
The watchlist file is straightforward:
exploit.to
virus.malware.to
.bmw.de
Prefixing a domain with a . signifies monitoring the domain and all its subdomains. Without the prefix, Certspotter will monitor certificates matching the exact domain/subdomain.
I can anticipate your next thought—you want all the logs, don’t you? Since 2013, there have been 7,485,653,605 of them (Source), requiring substantial storage. If you’re undeterred, you’d need to modify this code here and rebuild Certspotter to bypass the watchlist and retrieve everything.
Now, let’s set up the systemd service. Here’s how mine looks:
sudo nano /etc/systemd/system/certspotter.serviceYou’ll need to adjust the paths unless your username is also karl:
[Unit]
Description=Certspotter Service
After=network.target
[Service]
Environment=HOME=/home/karl
Environment=CERTSPOTTER_CONFIG_DIR=/home/karl/.certspotter
Type=simple
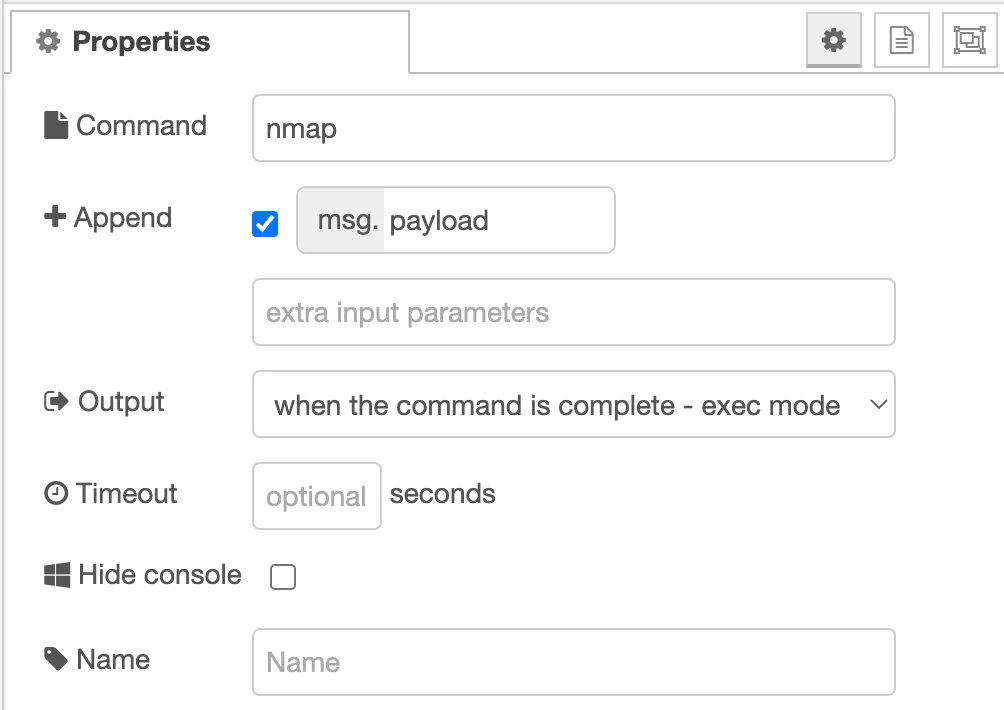
ExecStart=/home/karl/go/bin/certspotter -verbose
Restart=always
RestartSec=3
[Install]
WantedBy=multi-user.targetNote: I’m currently not utilizing the -start_at_end flag. As a result, my script begins its operation from the initial point and might take a considerable amount of time to detect recently issued certificates. By modifying the line that begins with
ExecStart=and adding the-start_at_endparameter to the certspotter command, you instruct the script to disregard previously issued certificates and commence monitoring from the current time onward.
To activate and check if it’s running, run this:
sudo systemctl daemon-reload
sudo systemctl start certspotter
sudo systemctl status certspotter
Now let us add a script in hooks.d:
touch $HOME/.certspotter/hooks.d/certspotter.sh
sudo chmod u+x $HOME/.certspotter/hooks.d/certspotter.sh
If you have issues with reading ENV, you might have to experiment with the permissions.
In cerstpotter.sh:
#!/bin/bash

if [ -z "$EVENT" ] || [ "$EVENT" != 'discovered_cert' ]; then
    # no event
    exit 0
fi

DNS=$(cut -d "=" -f2 <<< "$SUBJECT_DN")
IP="$(dig "$DNS" A +short | grep -v '\.$' | head -n 1 | tr -d '\n')"
IP6="$(dig "$DNS" AAAA +short | grep -v '\.$' | head -n 1 | tr -d '\n')"

JSON_FILE_DATA=$(cat "$JSON_FILENAME")
dns_names=$(echo "$JSON_FILE_DATA" | jq -r '.dns_names | join("\n")')

JSON_DATA=$(cat <<EOF
{
    "pubkey": "$PUBKEY_SHA256",
    "watch_item": "$WATCH_ITEM",
    "not_before": "$NOT_BEFORE_RFC3339",
    "not_after": "$NOT_AFTER_RFC3339",
    "dns_names": "$dns_names",
    "issuer": "$ISSUER_DN",
    "asn": "$ASN",
    "ipv4": "$IP",
    "ipv6": "$IP6",
    "cn": "$SUBJECT_DN",
    "crt.sh": "https://crt.sh/?sha256=$CERT_SHA256"
}
EOF
)

# post data to br... might do somethign with answer
response=$(curl -s -X POST -H "Content-Type: application/json" \
    -H "Content-Type: application/json" \
    -d "$JSON_DATA" \
    "http://10.102.0.11:8080/api/v1/certspotter/in")
You could edit this to your liking. The data should look like this:
{
  "pubkey": "ca4567a91cfe51a2771c14f1462040a71d9b978ded9366fe56bcb990ae25b73d",
  "watch_item": ".google.com",
  "not_before": "2023-11-28T14:30:55Z",
  "not_after": "2024-01-09T14:30:54Z",
  "dns_names": ["*.sandbox.google.com"],
  "isssuer": "C=US, O=Google Trust Services LLC, CN=GTS CA 1C3",
  "asn": "GOOGLE,US",
  "ipv4": "142.250.102.81",
  "ipv6": "2a00:1450:4013:c00::451",
  "cn": "CN=*.sandbox.google.com",
  "crt.sh": "https://crt.sh/?sha256=cb657858d9fb6475f20ed5413d06da261be20951f6f379cbd30fe6f1e2558f01"
}
Depending on your target, it will take a while until you see results. Maybe even days.
Summary
In this first part of our exploration into Certspotter, we’ve laid the groundwork for understanding its significance in passive reconnaissance. Certspotter emerges as a pivotal tool in monitoring certificate transparency logs, enabling hackers to gather crucial intelligence without alerting their targets.
We’ve delved into the distinction between passive and active reconnaissance, emphasizing the importance of discreet operations in avoiding detection. Through Certspotter, hackers gain the ability to monitor target domains and subdomains continuously, staying informed about new developments and potential vulnerabilities.
As we conclude Part 1, we’ve only scratched the surface of what Certspotter has to offer. In Part 2, we’ll dive deeper into advanced techniques for leveraging Certspotter’s capabilities, exploring tools to enrich our data and enhance our reconnaissance efforts. Stay tuned for an in-depth exploration of Certspotter’s potential in uncovering valuable insights for hackers.