
Hey there 👋 Since you’re reading this, chances are you’ve got some chaos brewing in your brain. I love it.
For legal reasons I must kindly ask you to read and actually understand my disclaimer.
Disclaimer:
The information provided on this blog is for educational purposes only. The use of hacking tools discussed here is at your own risk.
For the full disclaimer, please click here.
Full full disclosure: I did have written permission to do this. And anything I didn’t have written permission for is wildly exaggerated fiction, pure imagination, no receipts, no logs, nothing but brain static.
Now, another fair warning: this post is about to get particularly hairy. So seriously, do not try this without proper written consent, unless you have an unshakable desire to land yourself in a world of trouble.
Intro
I get bored really easily 😪. And when boredom strikes, I usually start a new project. Honestly, the fact that I’m still sticking with this blog is nothing short of a miracle. Could this be my forever project? Who knows, place your bets.
Anyway, purely by accident, I stumbled across a tool that I immediately recognized as easy mode for typo squatting and bit squatting. The tool itself was kinda trash, but it did spark a deliciously questionable thought in my brain:
“Can I intercept sensitive emails from government organizations and snatch session tokens and API keys?”
To keep you on the edge of your seat (and slightly concerned), the answer is: Yes. Yes, I can. And trust me, it’s way worse than you think.
It’s always the stupidly simple ideas that end up working the best.
Typosquatting
Typosquatting, also called URL hijacking, a sting site, a cousin domain, or a fake URL, is a form of cybersquatting, and possibly brandjacking which relies on mistakes such as typos made by Internet users when inputting a website address into a web browser. A user accidentally entering an incorrect website address may be led to any URL, including an alternative website owned by a cybersquatter.
Basically, you register kark.fail, kick back, and wait for people to fat-finger karl.fail and trust me, they will. Congratulations, you just hijacked some of my traffic without lifting a finger. It’s like phishing, but lazier.
Bitsquatting
Bitsquatting is a form of cybersquatting which relies on bit-flip errors that occur during the process of making a DNSrequest. These bit-flips may occur due to factors such as faulty hardware or cosmic rays. When such an error occurs, the user requesting the domain may be directed to a website registered under a domain name similar to a legitimate domain, except with one bit flipped in their respective binary representations.
You register a domain that is a single-bit off your target, on my site you could register “oarl.fail”
- ASCII of “k” = 01101011
- Flipping the third-to-last bit:
- 01101111 → This corresponds to “o”
- This changes “karl” → “oarl“
Personally I have had 0 success with this, but apparently still works.
The Setup
Now that you know the basics, you’re officially armed with enough knowledge to cause some mild chaos 🎉.
Here’s what we need to get started:
- Money – Because sadly, domains don’t buy themselves.
- A domain registrar account – I use Namecheap
- Cloudflare account (optional, but much recommended)
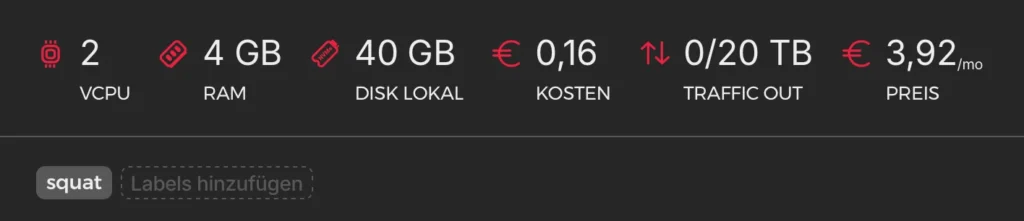
- A server connected to the internet – I use Hetzner (optional but also recommended)
Getting a Domain
You should probably know this if you’re planning to hack the government (or, you know, just theoretically explore some questionable cyberspace).
Step one:
Follow all the steps on Namecheap or whichever registrar you fancy. You can probably find one that takes Bitcoin or Monero, if you want.
For generating typo domains effortlessly, I use ChatGPT:
Give me the top 5 most common typos english speaking people make for the domain "karl.fail" on a qwerty keyboard.ChatGPT does not know .fail is a valid TLD, but you get the point.
Step two
Add your domain to Cloudflare unless, of course, you’re feeling extra ambitious and want to host your own Mailserver and Nameserver. But let’s be real, why suffer?

Mailserver
I highly recommend Mailcow, though it might be complete overkill for this—unless your job involves hacking governments. In that case, totally worth it.
Nameserver
This is the best tutorial I could find for you—he’s using CoreDNS.
In my tests, I used Certainly, which built a small authoritative DNS server with this Go library.
The big perk of running your own nameserver is that you get to log every DNS query to your domain. As many pentesters know, DNS is passive recon—it doesn’t hit the target directly. That’s why you can get away with otherwise noisy tasks, like brute-forcing subdomains via DNS. But if your target runs their own nameserver, they’ll see you poking around.
I went with a different setup because DNS logs are a mess—super noisy and, honestly, boring. Everyone and their mom ends up enumerating your domain until kingdom come.
Beware! Different top-level domain organizations have different expectations for name servers. I ran into some trouble with the .de registry, DENIC—they insisted I set up two separate nameservers on two different IPs in two different networks. Oh, and they also wanted pretty SOA records before they’d even consider my .de domains.
Save yourself the headache—double-check the requirements before you spend hours wrecking yourself.
Hetzner Server
Any server, anywhere, will do—the goal is to host a web server of your choice and capture all the weblogs. I’ll be using Debian and Caddy for this.
We’ll be building our own Caddy with the Cloudflare plugin because I couldn’t get wildcard certificates to work without it. Plus, I always use Cloudflare (❤️ you guys).
Installation of Go (current guide):
sudo apt update && sudo apt upgrade -y
wget https://go.dev/dl/go1.23.5.linux-amd64.tar.gz
rm -rf /usr/local/go && tar -C /usr/local -xzf go1.23.5.linux-amd64.tar.gz
export PATH=$PATH:/usr/local/go/bin
echo 'export PATH=$PATH:/usr/local/go/bin' >> ~/.profile
source ~/.profile
Build Caddy with Cloudflare-DNS
The official guide is here.
go install github.com/caddyserver/xcaddy/cmd/xcaddy@latest
sudo mv ~/go/bin/xcaddy /usr/local/bin/
xcaddy build --with github.com/caddy-dns/cloudflare
sudo mv caddy /usr/local/bin/
caddy version
Getting a Cloudflare API Key
To get the API key just follow the Cloudflare docs, I set mine with these permissions:
All zones - Zone:Read, SSL and Certificates:Edit, DNS:Edit
Here is also the official page for the Cloudflare-DNS Plugin.
export CF_API_TOKEN="your_cloudflare_api_token"
echo 'CF_API_TOKEN="your_cloudflare_api_token"' | sudo tee /etc/default/caddy > /dev/null
Caddyfile
I am using example domains!
(log_requests) {
	log {
		output file /var/log/caddy/access.log
		format json
	}
}

karlkarlkarl.de, *.karlkarlkarl.de {
	import log_requests

	tls {
		dns cloudflare {env.CLOUDFLARE_API_TOKEN}
	}

	header Content-Type "text/html"
	respond "Wrong!" 200
}

karlkarl.de, *.karlkarl.de {
	import log_requests

	tls {
		dns cloudflare {env.CLOUDFLARE_API_TOKEN}
	}

	header Content-Type "text/html"
	respond "Wrong!" 200
}
Running Caddy as a service
nano /etc/systemd/system/caddy.service[Unit]
Description=Caddy Web Server
After=network.target
[Service]
User=caddy
Group=caddy
ExecStart=/usr/bin/caddy run --config /etc/caddy/Caddyfile --adapter caddyfile
EnvironmentFile=/etc/default/caddy
AmbientCapabilities=CAP_NET_BIND_SERVICE
Restart=always
RestartSec=5s
LimitNOFILE=1048576
[Install]
WantedBy=multi-user.targetsystemctl start caddy
systemctl enable caddy
systemctl status caddyEverything should work if you closely followed the steps up until now. If not check the caddy.service and Caddyfile. To check logs use:
journalctl -u caddy --no-pager -n 50 -fJust a heads-up—Caddy automatically redacts credentials in its logs, and getting it to not do that is kind of a pain.
{"level":"info","ts":1738162687.1416154,"logger":"http.log.access.log0","msg":"handled request","request":{"remote_ip":"1.0.0.1","remote_port":"62128","client_ip":"1.0.0.1","proto":"HTTP/1.1","method":"GET","host":"api.karlkarlkarl.de","uri":"/api/resource","headers":{"User-Agent":["curl/8.7.1"],"Authorization":["REDACTED"],"Accept":["application/json"]}},"bytes_read":0,"user_id":"","duration":0.000052096,"size":0,"status":308,"resp_headers":{"Connection":["close"],"Location":["https://api.karlkarlkarl.de/login"],"Content-Type":[],"Server":["Caddy"]}}"Authorization":["REDACTED"]Lame for us 😒. If you want more control over logging, you can use any other server or even build your own. One day I might add this as a feature to my Node-RED-Team stack, including automatic Cloudflare settings via API, just add domain and go.
As I mentioned earlier, I had permission for this, and my scope didn’t allow me to grab actual credentials since they belonged to third parties using the service.
The most interesting things in these logs:
- Credentials
- IP addresses
- Paths
- Subdomains
- Cookies and tokens
That should be more than enough to hijack a session and dig up even more data—or at the very least, get some freebies.
Cloudflare – DNS & Mail
DNS
We’ll add some wildcard DNS records so that all subdomains get routed to our server—because let’s be real, we don’t know all the subdomains of our target.

It’s almost as good as having your own nameserver. Plus, Cloudflare gives you a ton of DNS logs. Sure, you won’t get all of them like you would with your own setup, but honestly… I don’t really care that much about DNS logs anyway.
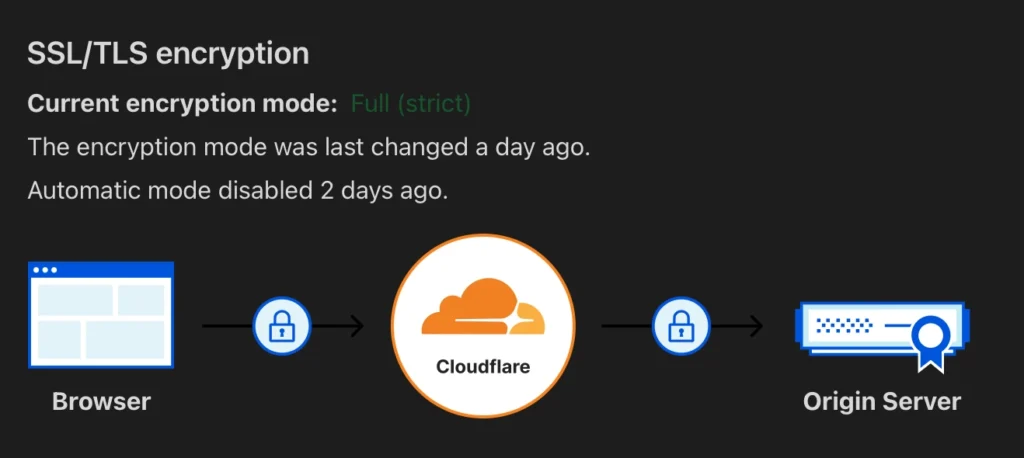
Make sure to check your SSL/TLS setting in Cloudflare to be “Full (strict)” otherwise Caddy and Clouflare will get stuck in a redirect loop and it is gonna take you forever to figure out that this is the issue, which will annoy you quite a bit.
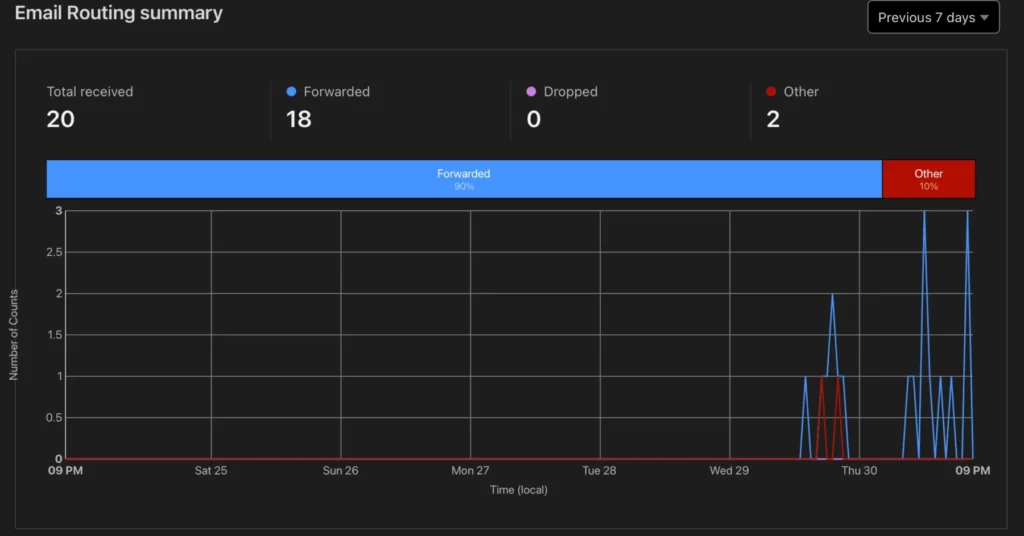
Set up email routing through Cloudflare—it’s easy, just two clicks. Then, you’ll need a catch-all email rule and a destination address.
This will forward all emails sent to the typo domain straight to your chosen domain.

You could set up your own mail server to do the same thing, which gives you more control over how emails are handled. But for my POC, I didn’t need the extra hassle.
I should mention that I set up an email flow to notify people that they sent their mail to the wrong address and that it was not delivered using n8n:

This post is already getting pretty long, so I might do a separate one about n8n another time. For now, just know that people were notified when they sent mail to the wrong address, and their important messages were delivered into the void.
Profit
By “profit,” I’m, of course, making a joke about the classic Step 1 → Step 2 → Step 3 → Profit meme—not actual profit. That would be illegal under American law, so let’s keep things legal and fun. Just thought I’d clarify 🫡.
Now, you wait. Check the logs now and then, peek at the emails occasionally. Like a fisherman (or fisherwoman), you sit back and see what bites.
How long does it take? Well, that depends on how good your typo is and how popular your target is—could be minutes, could be days.
For me, I was getting around 10-15 emails per day. The weblogs are mostly just people scanning the crap out of my server.
Conclusion
I bought 14 domains with the most common typos for my target and ended up catching around 400 emails in a month —containing some of the most devastating info you could imagine.
I’m talking government documents, filled-out contracts, filed reports. I got people’s birth certificates, death certificates, addresses, signatures—you name it.
Think about it—when you email a government office, they already know everything about you, so you don’t think twice about sending them paperwork, right? Well… better triple-check that email address before you hit send, or guess what? It’s mine now.
As for weblogs, their real value comes in when a developer is testing a tool and mistypes a public domain. I didn’t manage to snag any API keys, but I guarantee that if your target has public APIs or a sprawling IT infrastructure, credentials will slip through eventually.

Defense
The only real defense is to buy all the typo domains before the bad guys do. There are services that specialize in this—if you’ve got the budget, use them.
If you can’t buy them, monitor them. Plenty of commercial tools can do this, or you can build your own. The easiest DIY approach would be to use dnstwist to generate typo variations and check WHOIS records or dig to see if anyone has registered them.
Monitoring your Adversaries
Let me give you an example. Run dnstwist on “bund.de” the German government domain for all it’s ministries:
# -m, --mxcheck     Check if MX host can be used to intercept emails
# -g, --geoip       Lookup for GeoIP location
# -r, --registered  Show only registered domain names

dnstwist -m -g -r bund.de
You will get a list of all similar domains which have MX-Records, this will tell you potential entities that could be listening in on emails:
*original      bund.de      80.245.156.34/Germany NS:argon.bund.de MX:mx1.bund.de
addition       bundd.de     104.21.48.157 2606:4700:3036::6815:309d NS:coleman.ns.cloudflare.com MX:mx00.kundenserver.de
addition       bundy.de     159.89.214.161/Germany
addition       bundp.de     162.55.40.124/Germany NS:ns1.redirectdom.com
addition       bundi.de     176.9.82.176/Germany NS:ns1.ns.de
addition       bund2.de     185.26.156.203/Germany 2a00:d0c0:200:0:b9:1a:9c:9e NS:helium.ns.hetzner.de MX:mail.bund2.de
addition       bundx.de     199.59.243.228/UnitedStates 2a01:4f8:1c17:fa73::1 NS:ns1.dovendi.nl SPYING-MX:mx186.m2bp.com
addition       bundf.de     217.160.0.113/Germany NS:ns1050.ui-dns.biz MX:mx00.ionos.de
addition       bundl.de     217.160.0.1/Germany 2001:8d8:100f:f000::272 NS:ns1080.ui-dns.biz MX:mx00.ionos.de
addition       bundg.de     217.160.0.241/Germany NS:ns.ruhrcom.de SPYING-MX:bundg-de.mail.protection.outlook.com
addition       bundt.de     217.160.0.26/Germany NS:ns1017.ui-dns.biz MX:mx00.ionos.de
addition       bundw.de     217.160.0.70/Germany NS:ns1028.ui-dns.biz SPYING-MX:bundw-de.mail.protection.outlook.com
addition       bundz.de     23.88.34.196/Germany NS:ns1.redirectdom.com
addition       bunde.de     46.243.95.178/Germany NS:cns1.alfahosting.info SPYING-MX:mx03.secure-mailgate.com
addition       bundm.de     64.190.63.222/Germany NS:ns1.sedoparking.com MX:localhost
addition       bundk.de     78.46.144.104/Germany 2a01:4f8:d0a:52cc::2 NS:ns1.brandshelter.com SPYING-MX:bundk-de.mail.protection.outlook.com
addition       bunda.de     78.47.106.64/Germany NS:ns1.redirectdom.com
addition       bundr.de     78.47.106.64/Germany NS:ns1.redirectdom.com
addition       bundv.de     78.47.106.64/Germany NS:ns1.redirectdom.com
addition       bundn.de     81.169.145.64/Germany 2a01:238:20a:202:1064:: NS:docks06.rzone.de SPYING-MX:smtpin.rzone.de
addition       bundq.de     81.169.145.86/Germany 2a01:238:20a:202:1086:: NS:docks19.rzone.de SPYING-MX:smtpin.rzone.de
addition       bundu.de     85.13.133.184/Germany NS:ns3.kasserver.com SPYING-MX:v076474.kasserver.com
addition       bundb.de     85.13.150.146/Germany NS:ns5.kasserver.com MX:alt1.aspmx.l.google.com
addition       bundh.de     85.13.157.107/Germany NS:ns5.kasserver.com SPYING-MX:bundh-de.mail.protection.outlook.com
addition       bundj.de     89.22.106.10/Germany NS:cns1.cloudpit.de SPYING-MX:mailin.hostingparadise.de
addition       bundc.de     89.31.143.90/Germany NS:ns.udag.de SPYING-MX:k00s18.meinserver.io
addition       bunds.de     91.195.241.232/Germany NS:sl1.sedo.com MX:localhost
addition       bundo.de     NS:nsa9.schlundtech.de SPYING-MX:bundo-de.mail.protection.outlook.com
bitsquatting   bunl.de      136.243.81.87/Germany NS:ns1.kv-gmbh.de
bitsquatting   bunf.de      167.235.89.124/Germany NS:ns1.kv-gmbh.de
bitsquatting   bune.de      176.9.82.176/Germany NS:ns1.ns.de
bitsquatting   buld.de      178.77.82.91/Germany 2a01:488:42:1000:b24d:525b:6a:e139 NS:ns01.domaincontrol.com MX:mx0.buld.de
bitsquatting   rund.de      185.53.177.51/Germany NS:ns1.parkingcrew.net
bitsquatting   cund.de      185.53.177.52/Germany NS:ns1.parkingcrew.net MX:mail.h-email.net
bitsquatting   bujd.de      217.154.121.61/Spain 2a02:2479:26:d200::1 NS:ns1.pceumel.eu SPYING-MX:mail.pceumel.eu
bitsquatting   buod.de      217.160.0.184/Germany 2001:8d8:100f:f000::263 NS:ns1091.ui-dns.biz MX:alt1.aspmx.l.google.com
bitsquatting   btnd.de      37.27.55.12/Finland NS:ns1.kv-gmbh.de
bitsquatting   bend.de      62.116.130.8/Germany NS:ns1.issociate.de MX:mail.xodox.de
bitsquatting   bwnd.de      78.46.45.41/Germany NS:ns1.kv-gmbh.de
bitsquatting   bufd.de      78.47.106.64/Germany NS:ns1.redirectdom.com
bitsquatting   fund.de      81.169.145.78/Germany 2a01:238:20a:202:1078:: NS:docks16.rzone.de SPYING-MX:smtpin.rzone.de
bitsquatting   jund.de      91.107.224.252/Germany 2a01:4f8:1c1a:27b0::1 NS:ns1.sodes.net MX:mx.sodes.net
bitsquatting   bunt.de      94.130.38.178/Germany NS:a.ns14.net
homoglyph      dund.de      109.224.228.62/Slovenia NS:ns4.nameshift.com MX:
homoglyph      bvmd.de      142.132.207.159/Germany NS:dns1.hostsharing.net MX:smailin1.hostsharing.net
homoglyph      burb.de      185.53.177.50/Germany NS:ns1.parkingcrew.net
homoglyph      bunb.de      185.53.178.52/Germany NS:ns1.parkingcrew.net SPYING-MX:mail.h-email.net
homoglyph      bumd.de      188.40.92.90/Germany
homoglyph      bunci.de     188.40.92.90/Germany
homoglyph      bvrd.de      212.162.53.170/UnitedKingdom NS:ns3.nsentry.de SPYING-MX:bvrd.de
homoglyph      dumd.de      212.90.148.7/Germany 2001:1640:5::3:5f NS:ns1.goneo.de MX:mx01.goneo.de
homoglyph      bųnd.de      213.186.33.5/France NS:dns19.ovh.net SPYING-MX:mx3.mail.ovh.net
homoglyph      bumb.de      217.160.0.160/Germany 2001:8d8:100f:f000::2c9 NS:ns1092.ui-dns.biz MX:mx00.ionos.de
homoglyph      dvnd.de      31.3.3.7/Turkey
homoglyph      dunb.de      64.190.63.222/Germany NS:ns1.sedoparking.com MX:localhost
homoglyph      ibund.de     78.47.106.64/Germany NS:ns1.redirectdom.com
homoglyph      clund.de     80.237.132.85/Germany 2a01:488:42:1000:50ed:8455:ff6f:9f22 NS:ns43.domaincontrol.com SPYING-MX:clund-de.mail.protection.outlook.com
homoglyph      llbund.de    80.246.60.90/Germany NS:ns1.antagus.de MX:mail.llbund.de
homoglyph      buńd.de      81.169.145.148/Germany 2a01:238:20a:202:1148:: NS:docks04.rzone.de SPYING-MX:smtpin.rzone.de
homoglyph      buňd.de      81.169.145.149/Germany 2a01:238:20a:202:1149:: NS:docks15.rzone.de SPYING-MX:smtpin.rzone.de
homoglyph      buñd.de      81.169.145.159/Germany 2a01:238:20a:202:1159:: NS:docks05.rzone.de SPYING-MX:smtpin.rzone.de
homoglyph      búnd.de      81.169.145.90/Germany 2a01:238:20a:202:1090:: NS:docks06.rzone.de SPYING-MX:smtpin.rzone.de
homoglyph      bünd.de      81.169.145.90/Germany 2a01:238:20a:202:1090:: NS:docks20.rzone.de SPYING-MX:smtpin.rzone.de
homoglyph      burd.de      83.169.2.4/France NS:ns65.domaincontrol.com SPYING-MX:mx0.burd.de
homoglyph      dundl.de     85.13.131.90/Germany NS:ns5.kasserver.com SPYING-MX:w01086fb.kasserver.com
homoglyph      bvnd.de      85.13.146.221/Germany NS:ns5.kasserver.com SPYING-MX:bvnd-de.mail.protection.outlook.com
homoglyph      durd.de      85.13.153.193/Germany NS:ns5.kasserver.com SPYING-MX:abwaribn.kasserver.com
homoglyph      bunď.de      91.204.46.223/Germany 2a03:4000:61:83a5::20:1869 NS:root-dns.netcup.net SPYING-MX:mail.xn--bun-pqa.de
homoglyph      bvnb.de      92.205.111.236/France NS:ns1.edv-nb.de MX:mail.bvnb.de
homoglyph      buņd.de      95.217.186.42/Finland NS:ns1.domainoffensive.de SPYING-MX:mxext1.mailbox.org
homoglyph      bunnd.de     NS:jonah.ns.cloudflare.com MX:route1.mx.cloudflare.net
hyphenation    bu-nd.de     159.89.214.161/Germany
hyphenation    bun-d.de     185.122.201.71/Turkey NS:ns21.domaincontrol.com MX:mail.dayfleet.de
insertion      nbund.de     142.132.181.81/Germany 2a01:4f8:1c17:fa73::1 NS:ns1.dovendi.nl SPYING-MX:mx186.m2bp.com
insertion      hbund.de     199.59.243.228/UnitedStates 2a01:4f8:1c17:fa73::1 NS:ns1.dovendi.nl MX:mx186.m2bp.com
insertion      vbund.de     45.67.69.52/Germany NS:ns1-tec.de MX:mx1.securemail.name
insertion      bhund.de     78.47.106.64/Germany NS:ns1.redirectdom.com
insertion      buind.de     78.47.106.64/Germany NS:ns1.redirectdom.com
omission       bnd.de       149.232.252.19/Germany NS:ns1-eu.123ns.eu MX:mail.bnd.de
omission       bud.de       81.169.145.68/Germany 2a01:238:20a:202:1068:: NS:docks16.rzone.de SPYING-MX:smtpin.rzone.de
omission       und.de       81.169.145.74/Germany 2a01:238:20a:202:1074:: NS:docks19.rzone.de SPYING-MX:smtpin.rzone.de
repetition     bbund.de     78.47.106.64/Germany NS:ns1.redirectdom.com
replacement    nund.de      103.224.182.245/UnitedStates NS:ns1.abovedomains.com SPYING-MX:park-mx.above.com
replacement    bubd.de      109.235.74.225/Netherlands 2a01:518:1:41:2::53 NS:ns1.yoursrs.com
replacement    hund.de      116.203.76.229/Germany NS:ns1.eick-it.com SPYING-MX:hund-de.mail.protection.outlook.com
replacement    bunx.de      151.252.49.69/Germany NS:ns1.domainers.de SPYING-MX:mail.bunx.de
replacement    bjnd.de      166.117.68.124/UnitedStates 2600:9000:a612:55d9:1b82:e963:5969:d2c7 NS:ns1.dns-redirect.com
replacement    bunr.de      167.235.89.124/Germany NS:ns1.kv-gmbh.de
replacement    gund.de      216.40.34.37/Canada NS:ns1.mailbank.com MX:mx.netidentity.com.cust.hostedemail.com
replacement    bznd.de      37.27.55.11/Finland NS:ns1.kv-gmbh.de
replacement    bynd.de      46.38.242.115/Germany NS:root-dns.netcup.net MX:mail.bynd.de
replacement    bind.de      62.75.221.173/France NS:ns10.nameserverservice.de SPYING-MX:mailsecurity.iprs.de
replacement    bhnd.de      64.190.63.222/Germany NS:ns1.sedoparking.com MX:localhost
replacement    bunc.de      64.190.63.222/Germany NS:ns1.sedoparking.com MX:localhost
replacement    buns.de      78.47.106.64/Germany NS:ns1.redirectdom.com
replacement    vund.de      88.99.186.219/Germany NS:ns1.wesellthisdomain.com SPYING-MX:mx179.m1bp.com
transposition  ubnd.de      136.243.81.230/Germany NS:ns1.kv-gmbh.de
transposition  budn.de      217.160.180.152/France NS:ns1.domaindiscount24.net
transposition  bnud.de      5.45.110.199/Germany NS:root-dns.netcup.net SPYING-MX:mail.bnud.de
various        bund-de.com  162.255.119.238/UnitedStates NS:dns1.registrar-servers.com SPYING-MX:eforward1.registrar-servers.com
various        bundde.com   207.148.248.143/UnitedStates
You can see that all of the typos are owned by other entities, not the German government. This is bad, if anyone unknowingly wanted to write an email to [email protected], having mistyped, will be intercepted.
You can easily set up monitoring with this setup. Sensitive information should not be sent over Email either way, so if you can use more secure solutions depending on your use case, even a web form is harder to intercept.
Hosting Look-Alike-Websites
Typo domains aren’t just used for passive logging, people also host malicious content and phishing campaigns on them. That said, those methods get caught pretty fast. The approach I showed you is much more silent and in my opinion, dangerous. It doesn’t set off alarms right away.
Domains are dirt cheap compared to the damage I could do if I decided to leak this to the press, extort people, or trick them into giving me money. You instantly gain trust because the emails you receive usually say things like “As we just discussed over the phone… or contain entire ongoing conversations.
This whole setup takes about an hour and costs maybe 50 bucks for some domains.
Anyway, thanks for reading. Good night, sleep tight, and don’t let the bed bugs bite.
Love you 😘