How I turned my server into a headless gaming powerhouse, battled occasional freezes, and won using Arch-based performance and open-source streaming.
Sorry for the clickbait, AI made me do it. For real though, I am gonna show you how to build your own stream machine, local “cloud” gaming monster.
There are some big caveats here before we get started (to manage expectations):
- Your mileage may vary, greatly! Depending on your hard and software versions you may not have any of the problems I have had, but you may also have many many more
- As someone new to gaming on Linux the whole “run an executable through another layer ob virtualization/emulation” feels wrong, but I guess does not make that much of a performance difference in the end.
If you guessed that this will be a huge long super duper long post, you guessed right… buckle up buddy!
My Setup
Hardware
- ASUS TUF Gaming AMD Radeon RX 7900 XTX OC Edition 24GB
- AMD Ryzen 7 7800X3D (AM5, 4.20 GHz, 8-Core)
- 128GB of DDR5 RAM
- Some HDMI Dummy Adapter: I got this one
Software
- Proxmox 9.1.4
- Linux Kernel 6.17
- CachyOS (It’s Arch btw)
- Sunshine and Moonlight
- Lutris (for running World of Warcraft.. yea I am that kind of nerd, I know.)
Preperation
Proxmox Host
This guide is specifically for my Hardware so again: Mileage may vary.
SSH into your Proxmox host as root or enter a shell in any way you like. We will change some stuff here.
nano /etc/default/grub# look for "GRUB_CMDLINE_LINUX_DEFAULT" and change it to this
GRUB_CMDLINE_LINUX_DEFAULT="quiet amd_iommu=on iommu=pt amdgpu.mes=0 video=efifb:off video=vesafb:off"update-grub# Blacklist
echo "blacklist amdgpu" > /etc/modprobe.d/blacklist.conf
echo "blacklist radeon" >> /etc/modprobe.d/blacklist.conf
echo "blacklist nouveau" >> /etc/modprobe.d/blacklist.conf
echo "blacklist nvidia" >> /etc/modprobe.d/blacklist.conf
# VFIO Modules
echo "vfio" > /etc/modules
echo "vfio_iommu_type1" >> /etc/modules
echo "vfio_pci" >> /etc/modulesBasically this enables passthrough and forces to proxmox host to ignore the graphics card (we want this).
# reboot proxmox host
reboot
Okay for some quality of life we will add a resource mapping for our GPU in Proxmox.
Datacenter -> Resource Mappings -> Add

Choose a name, select your devices (Audio + Graphic Card)
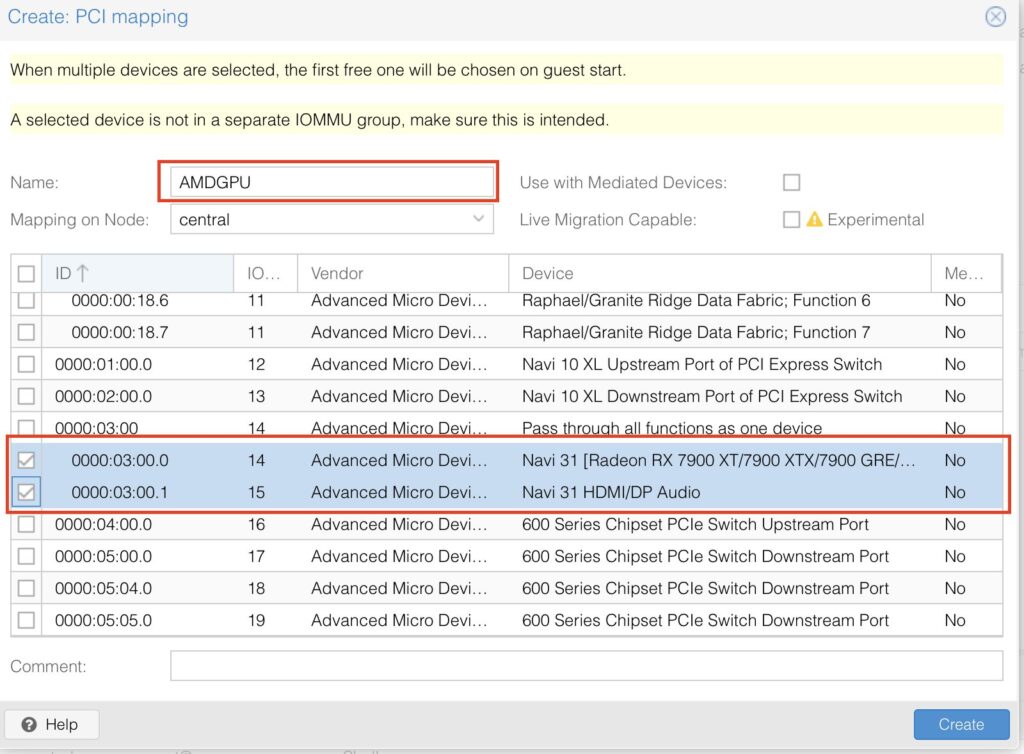
Now you can use mapped devices, this will come in handy in our next step.
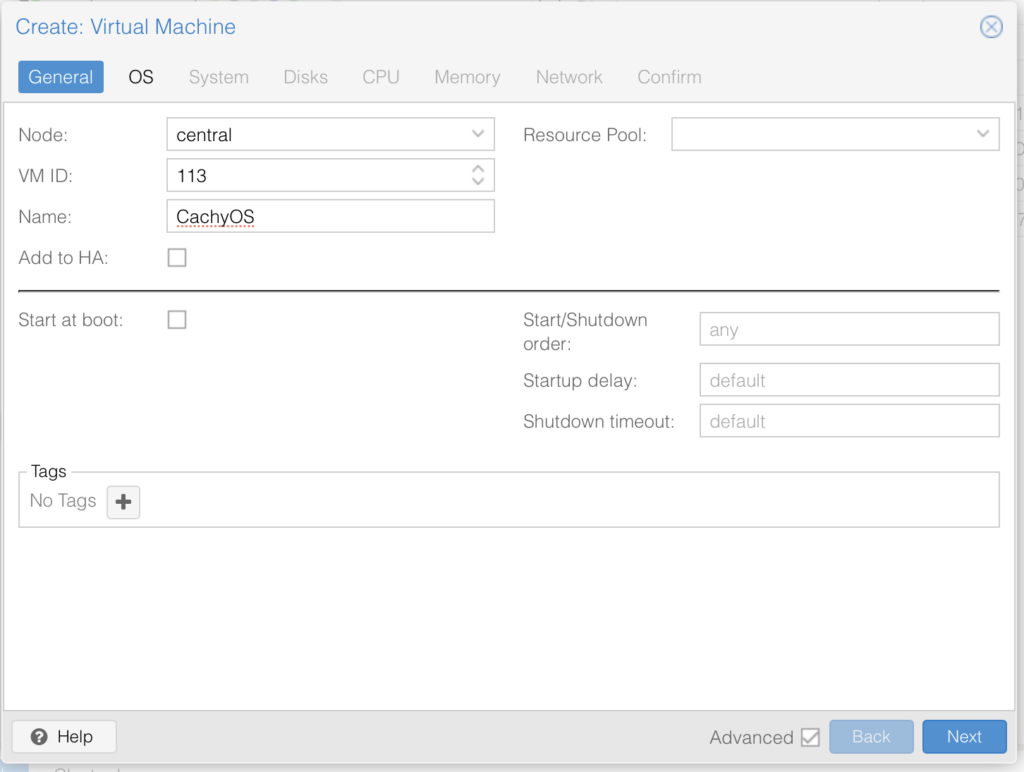
CachyOS VM
Name it whatever you like:
You will need to download CachyOS from here
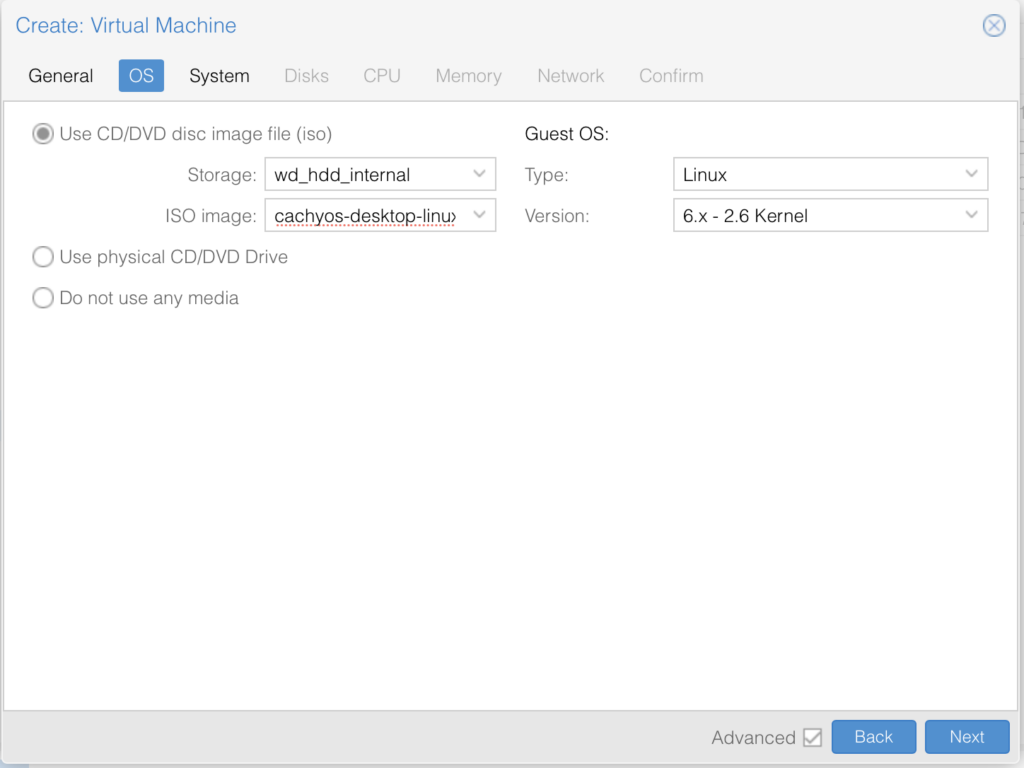
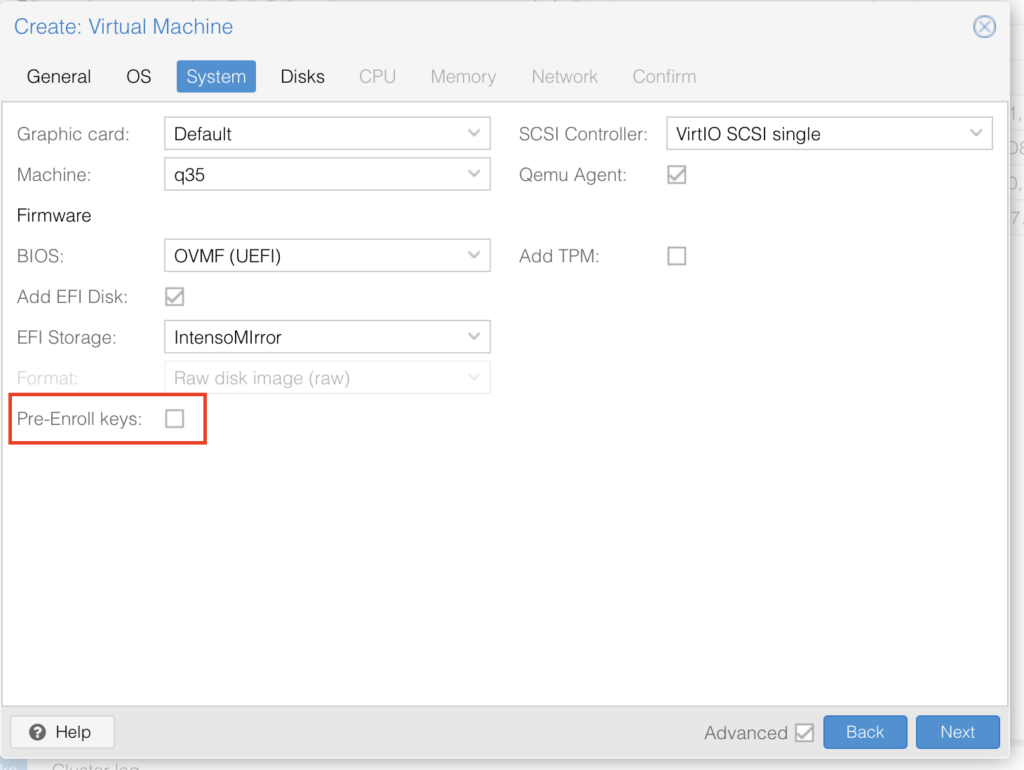
Copy all the settings I have here, make sure you disabled the Pre-Enrolled keys, this will try to verify that the OS is signed and fail since most Linux distros aren’t:
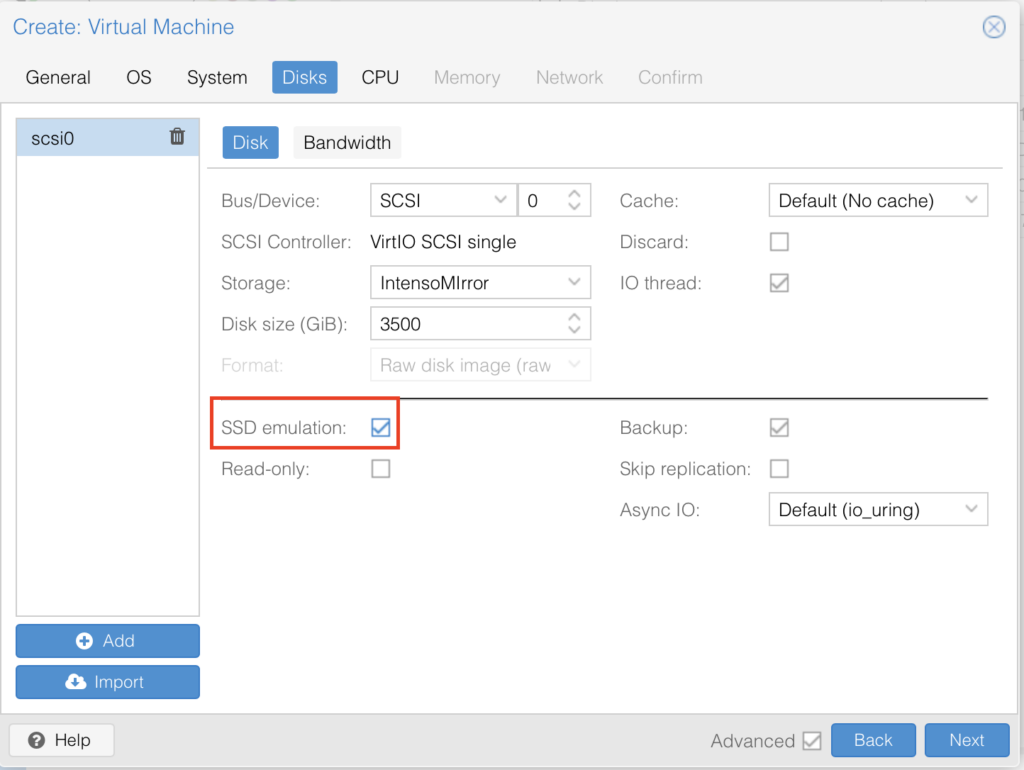
Leave all the defaults but use “SSD emulation” IF you are on an SSD (since we are building a gaming VM you should be):
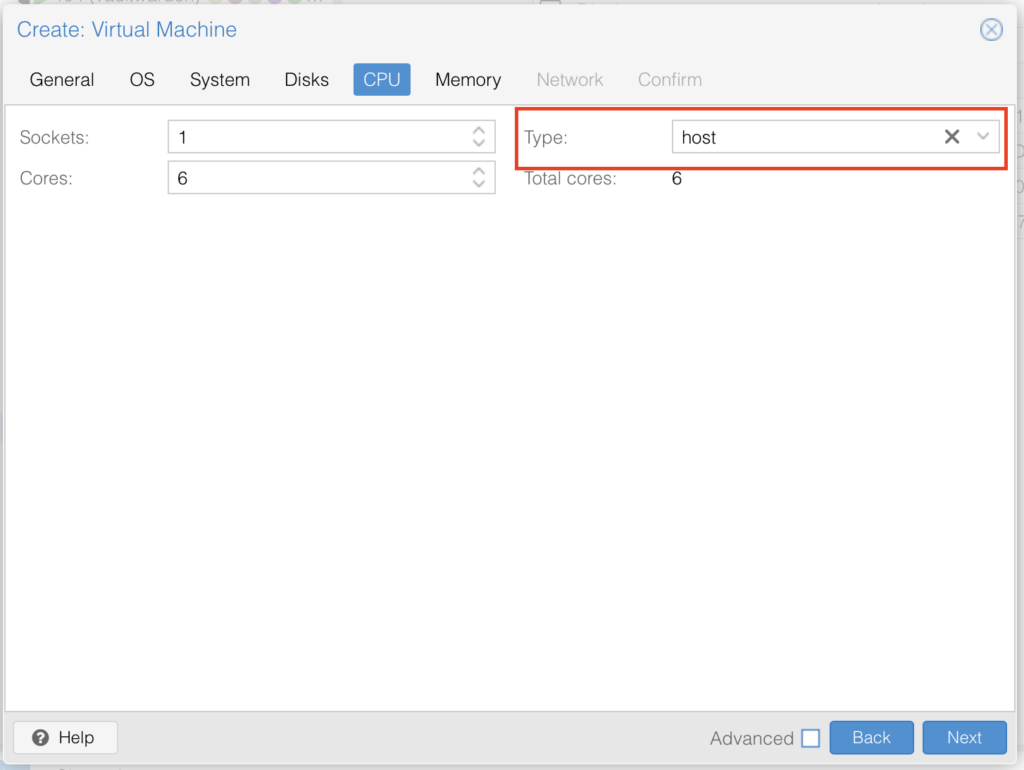
CPU needs to be set to host, I used 6 Cores, you can pick whatever (number of CPUs you actually have):
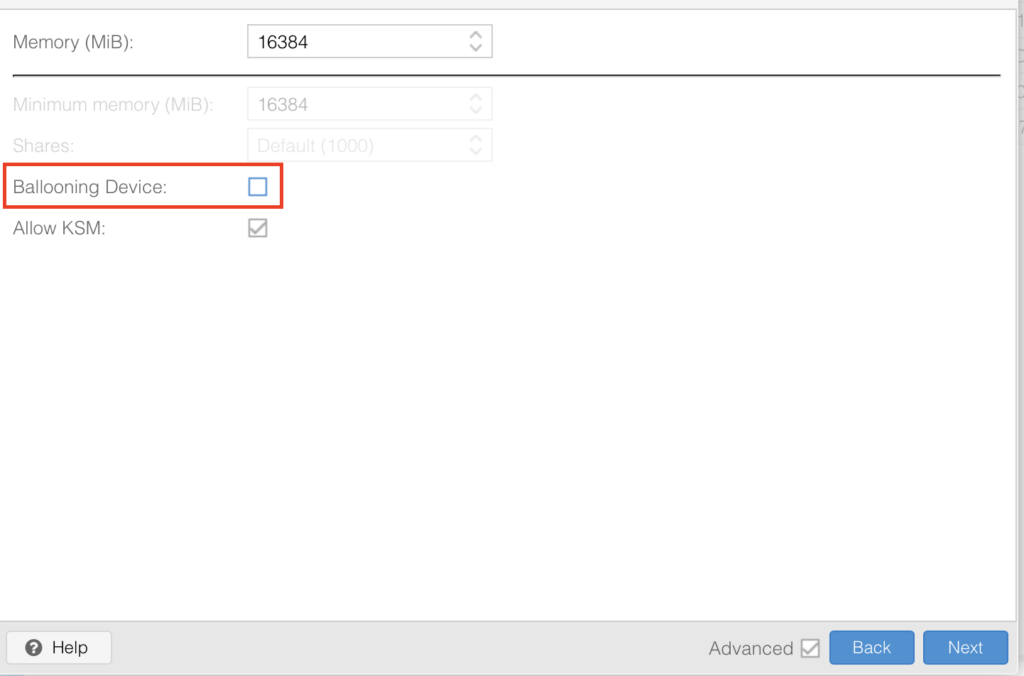
Pick whatever memory you have and want to use here I am going with 16GB, disable “Ballooning” in the settings, this disabled dynamic memory management, simply put when you run this VM it will always have the full RAM available otherwise if it doesnt need it all it would ge re-assigned which is not a great idea for gaming where demands change:
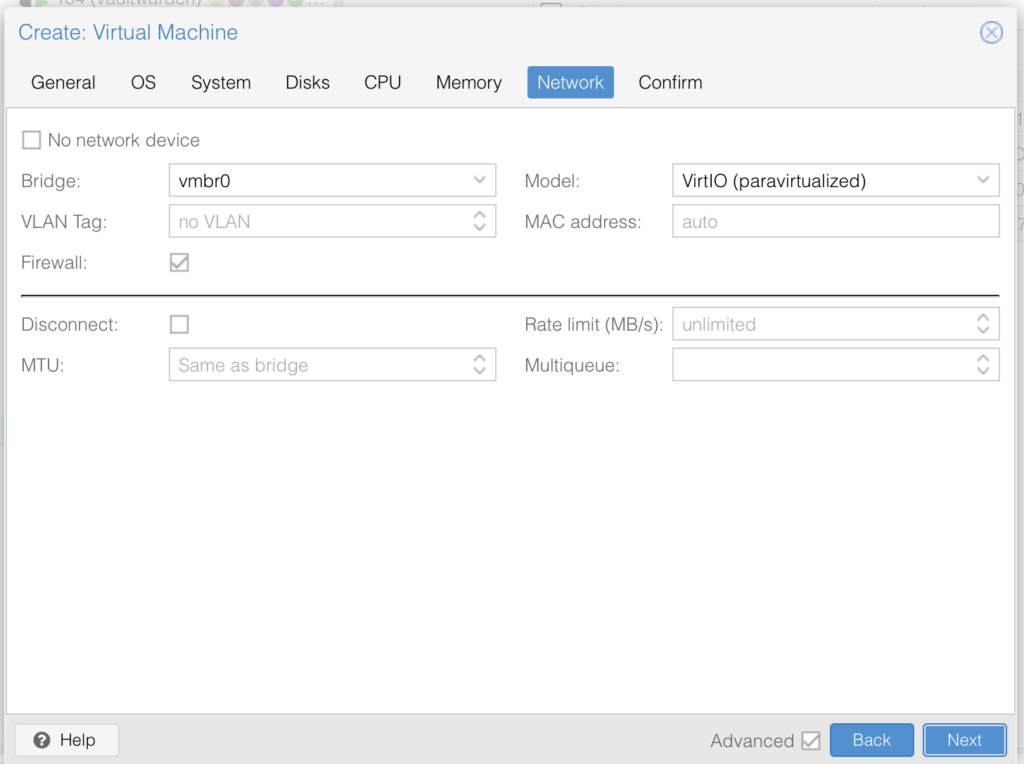
The rest is just standard:
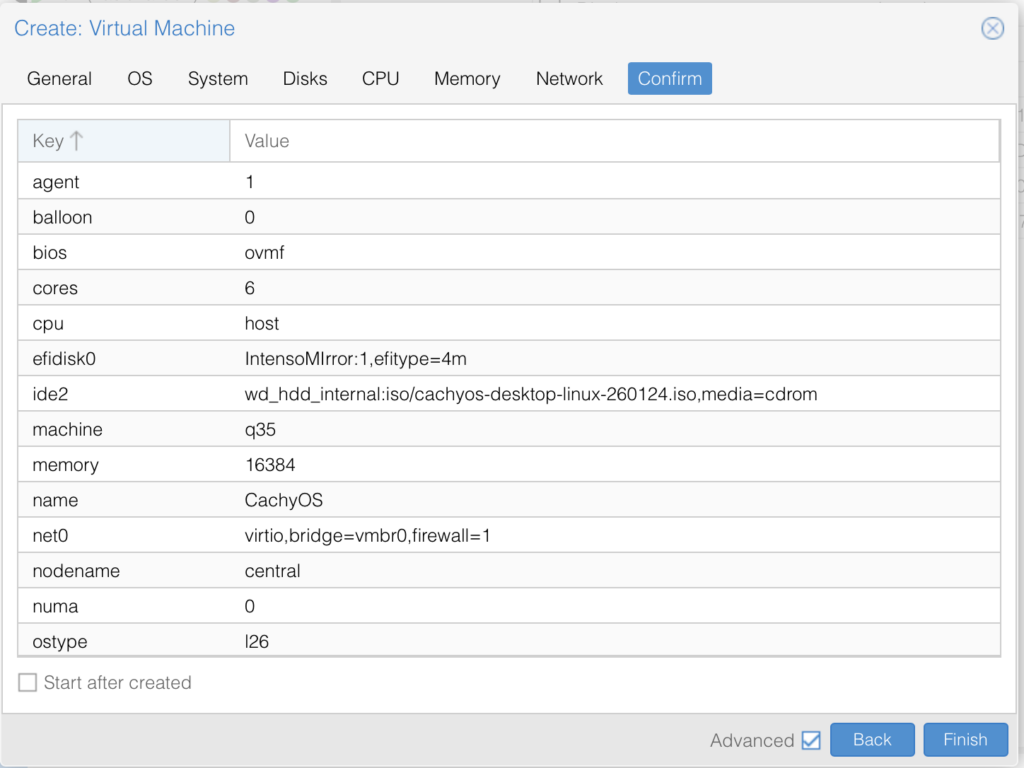
🚨NOTE: We have not added the GPU, yet. We will do this after installation.
Installing CachyOS
Literally just follow the instructions of the live image. It is super simple. If you get lost visit the CachyOS Wiki but literally just click through the installer.
Then shut down the VM.
Post Install
You will want to setup SSH and Sunshine before adding the GPU. We will be blind until Sunshine works and SSH helps a lot.
# enable ssh
sudo systemctl enable --now sshd

# install and enable sunshine
sudo pacman -S sunshine lutris steam
sysetmctl --user enable --now sunshine
sudo setcap cap_sys_admin+p $(readlink -f $(which sunshine))
echo 'KERNEL=="uinput", SUBSYSTEM=="misc", OPTIONS+="static_node=uinput", TAG+="uaccess"' | sudo tee /etc/udev/rules.d/85-sunshine-input.rules
echo 'KERNEL=="uinput", SUBSYSTEM=="misc", OPTIONS+="static_node=uinput", TAG+="uaccess"' | sudo tee /etc/udev/rules.d/60-sunshine.rules
systemctl --user restart sunshine
# had to run all these to get it to work wayland is a bitch
Sunshine settings that worked for me:
# nano ~/.config/sunshine/sunshine.conf
adapter_name = /dev/dri/renderD128 # <- leave auto detect or change to yours
capture = kms
encoder = vaapi # <- AMD specific
locale = de
output_name = 0 # <- depends on your actual dispslay

# restart after changing systemctl --user restart sunshine
Edit the Firewall, CachyOS comes with ufw enabled by default:
# needed for sunshine and ssh of course
sudo ufw allow 47990/tcp
sudo ufw allow 47984/tcp
sudo ufw allow 47989/tcp
sudo ufw allow 48010/tcp
sudo ufw allow 47998/udp
sudo ufw allow 47999/udp
sudo ufw allow 48000/udp
sudo ufw allow 48002/udp
sudo ufw allow 48010/udp
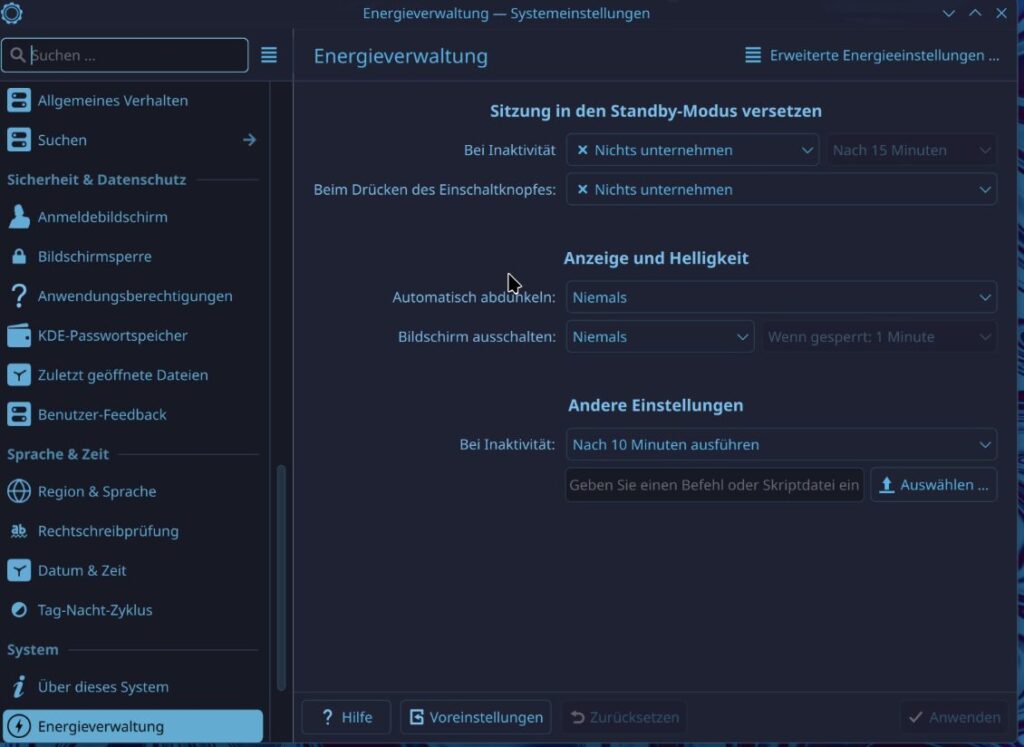
sudo ufw allow sshBefore we turn off the VM we need to enable automatic sign in and set the energy saving to never. We have to do this because Sunshine runs as user and if the user is not logged in then it does not have a display to show, if the energy saver shuts down the “Display” Sunshine wont work either.
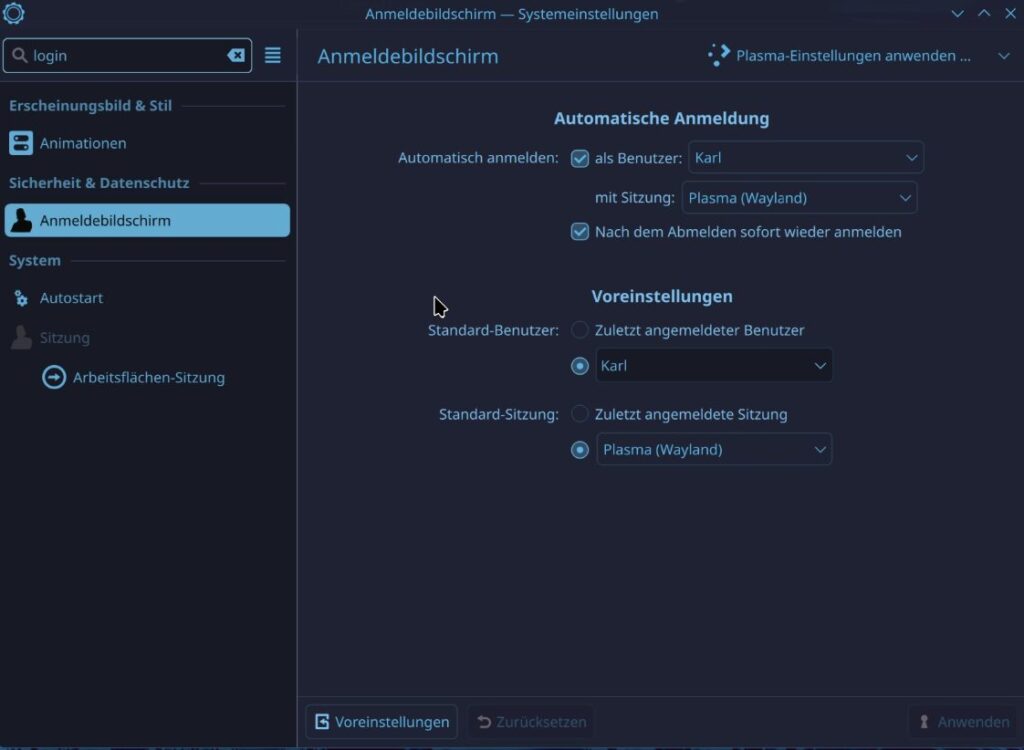
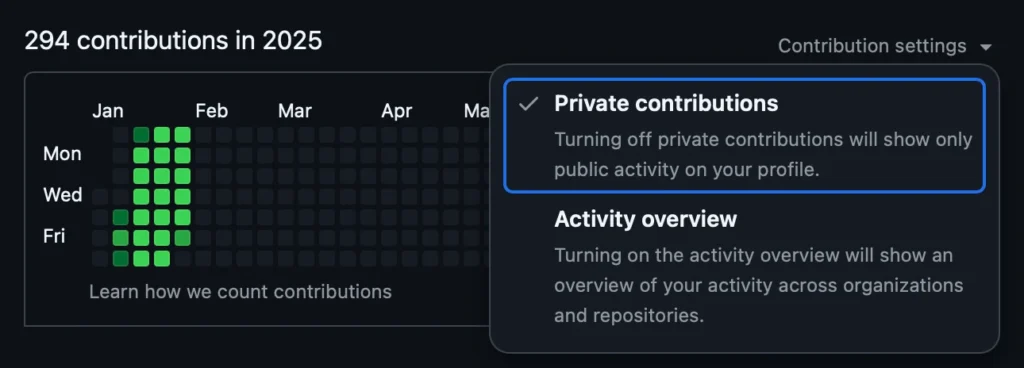
As a security person I really don’t like an OS without proper sign in. Password is still needed for
sudo, but for the sign in none is needed. I recommend tightening your Firewall or using Tailscale or Wireguard to allow only authenticated clients to connect.
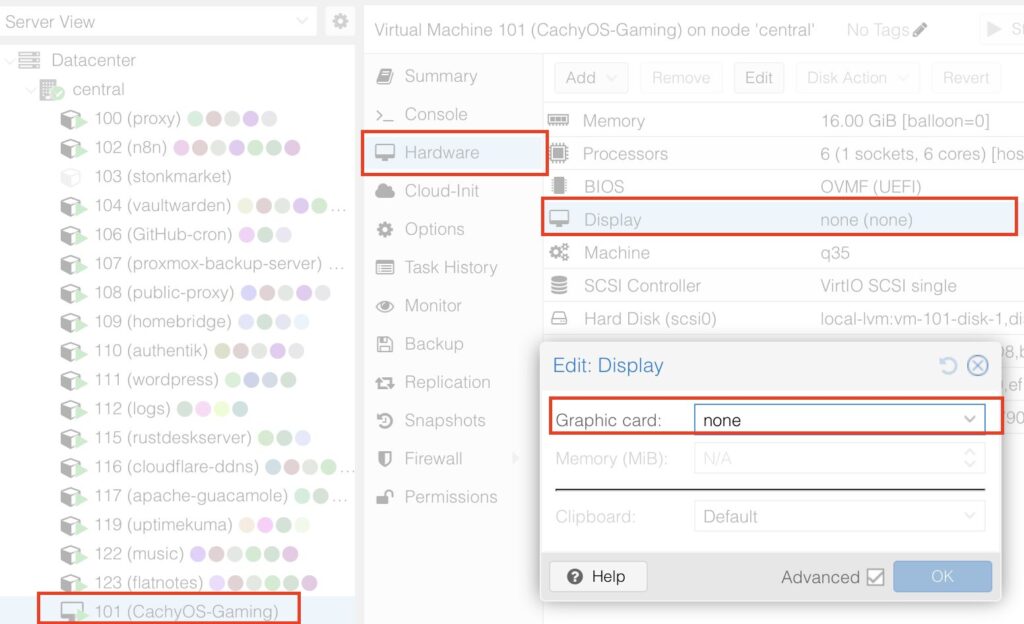
Now you will turn off the VM and remove the virtual display:
You need to download the Moonlight Client from here, they have a client for pretty much every single device on earth. The client will probably find your Sunshine server as is but if not you can just add the client manually (like I had to do).
This step is so easy that I didn’t think I needed to add any more info here.
Bringing it all together
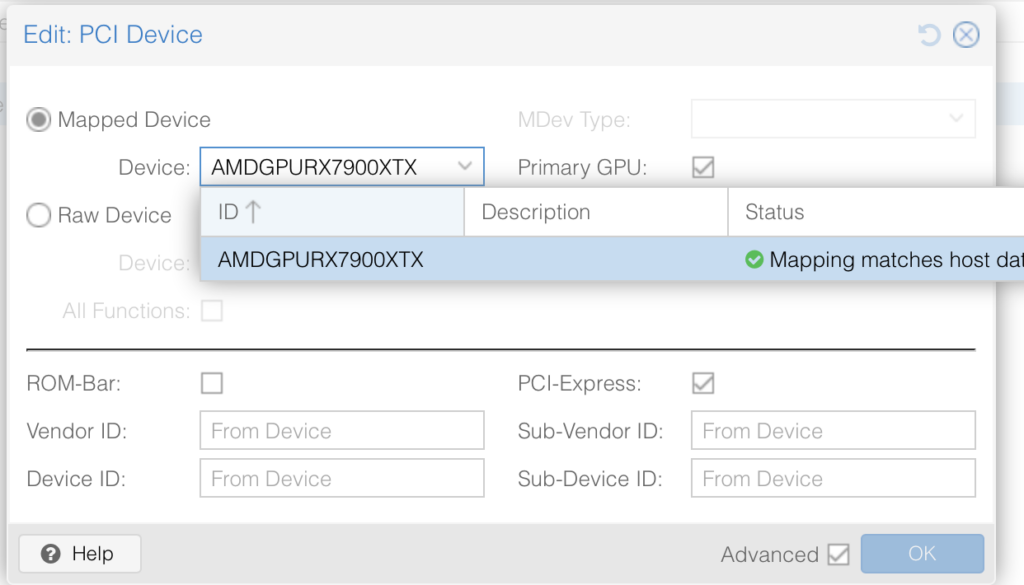
Okay, now add the GPU to the VM, double check that it is turned off.
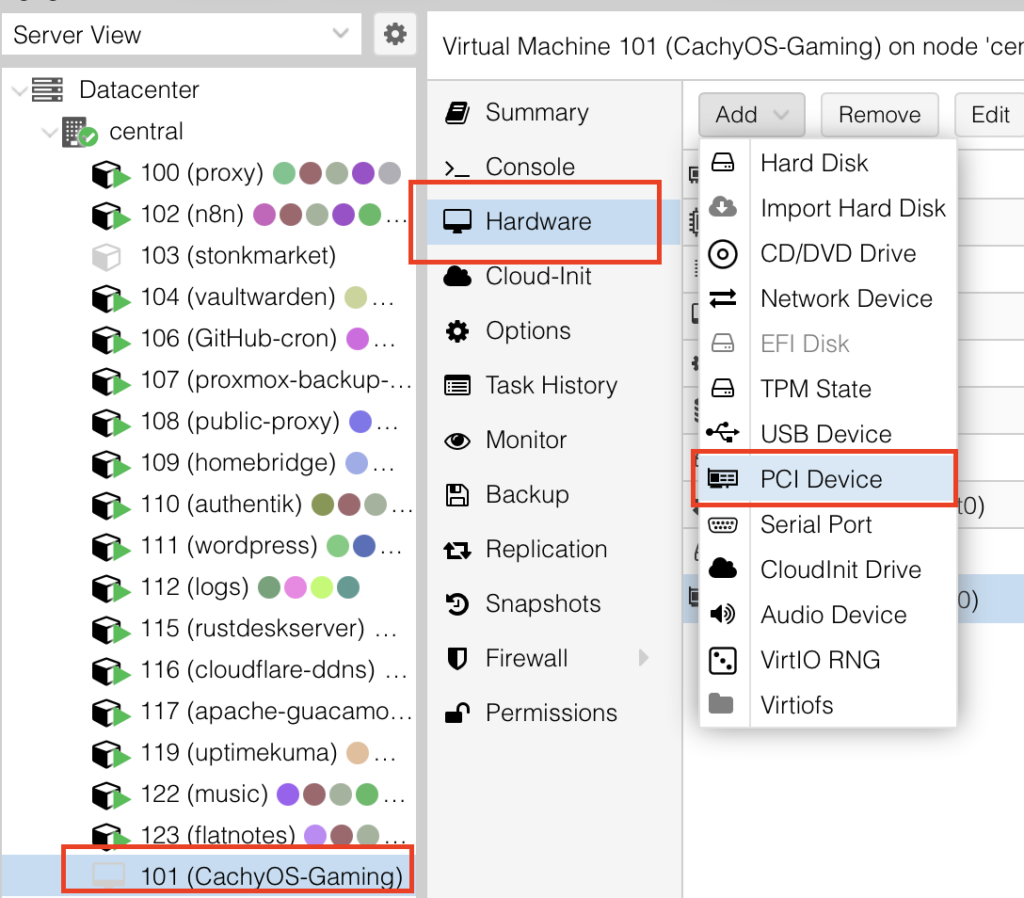
Select the VM -> Hardware -> Add -> PCI Device
Select your mapped GPU, ensure Primary GPU is selected, select the ROM-Bar (Important! This will help with the GPU getting stuck on reboot and shutdown, yes that is a thing). Tick on PCI-Express:
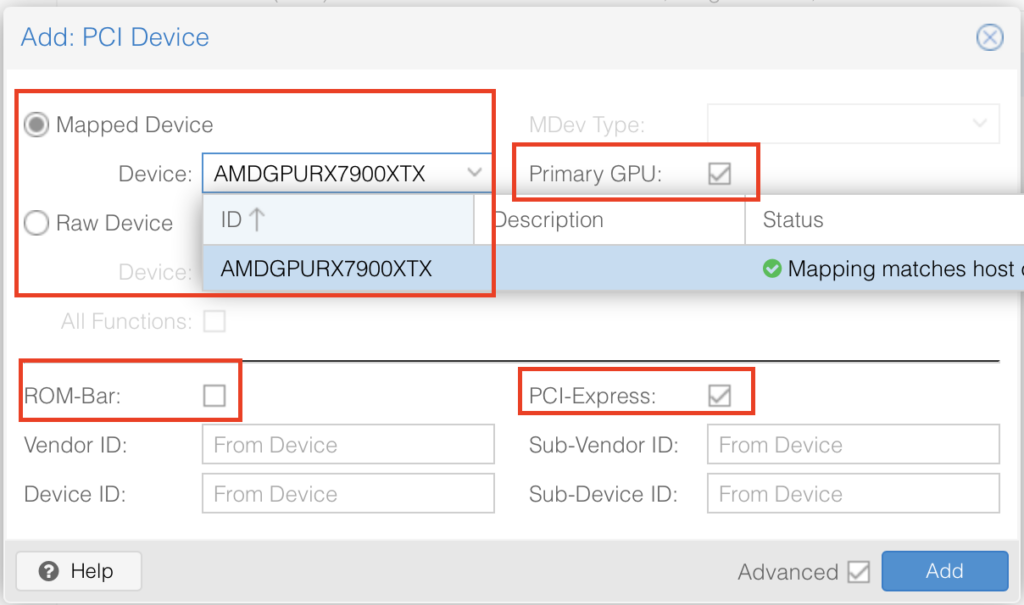
It should look something like this:

Now insert the HDMI Dummy Plug into the GPU and start the VM
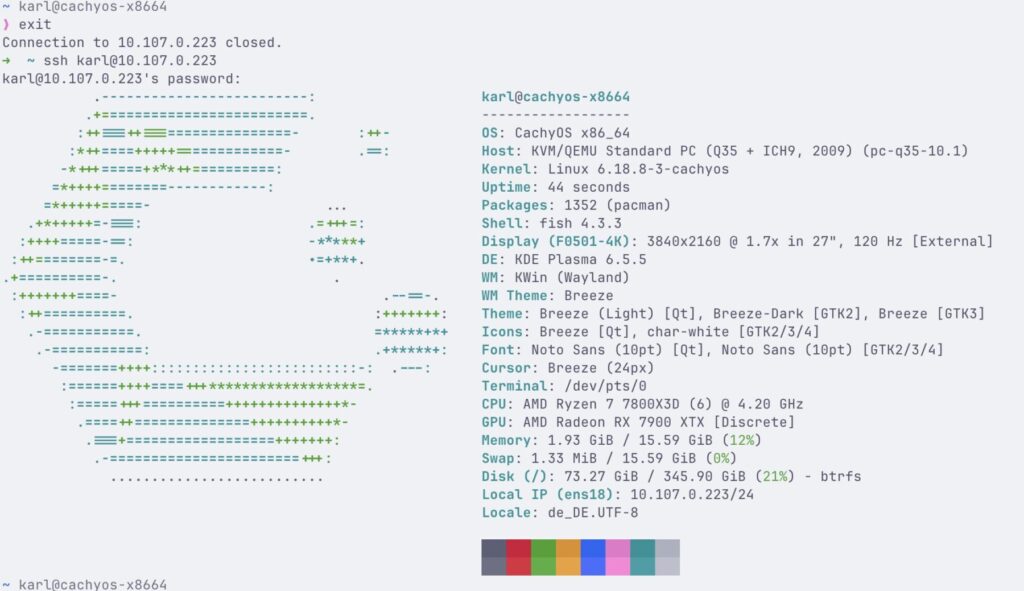
You should now be able to SSH into your VM:
Testing
If you are lucky then everything works out of the box now. I am not lucky.
I couldn’t get games to start through Steam thy kept crashing, the issue seemed to be old / non-existent Vulkan drivers for the GPU.
sudo pacman -Syu mesa lib32-mesa vulkan-radeon lib32-vulkan-radeon lib32-vulkan-mesa-layers lib32-libdisplay-info
sudo pacman -Syu
That fixed my Vulkan errors:
~ karl@cachyos-x8664
❯ vulkaninfo --summary
.....
Devices:
========
GPU0:
        apiVersion         = 1.4.328
        driverVersion      = 25.3.4
        vendorID           = 0x1002
        deviceID           = 0x744c
        deviceType         = PHYSICAL_DEVICE_TYPE_DISCRETE_GPU
        deviceName         = AMD Radeon RX 7900 XTX (RADV NAVI31)
        driverID           = DRIVER_ID_MESA_RADV
        driverName         = radv
        driverInfo         = Mesa 25.3.4-arch1.2
        conformanceVersion = 1.4.0.0
....
Here you can see Witcher 3 running:

Installing Battle.net
You can follow this guide here for the installation of Lutris. I just did:
sudo pacman -S lutrisMaybe that is why I have had issues? Who knows, it works now.
The rest is really simple:
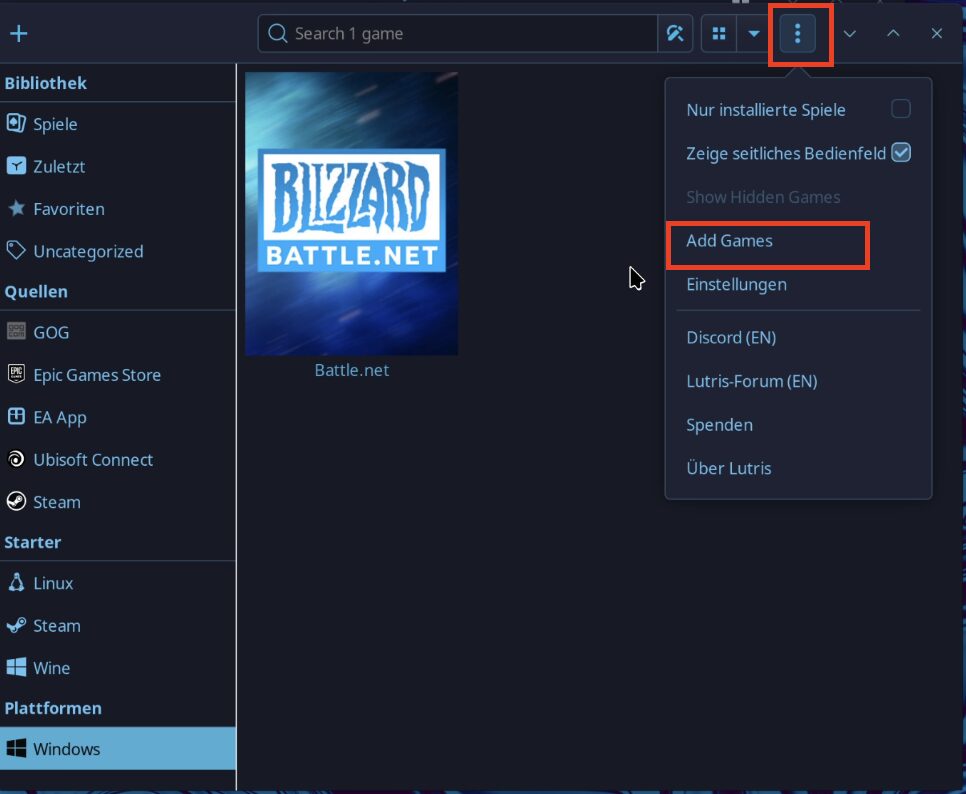
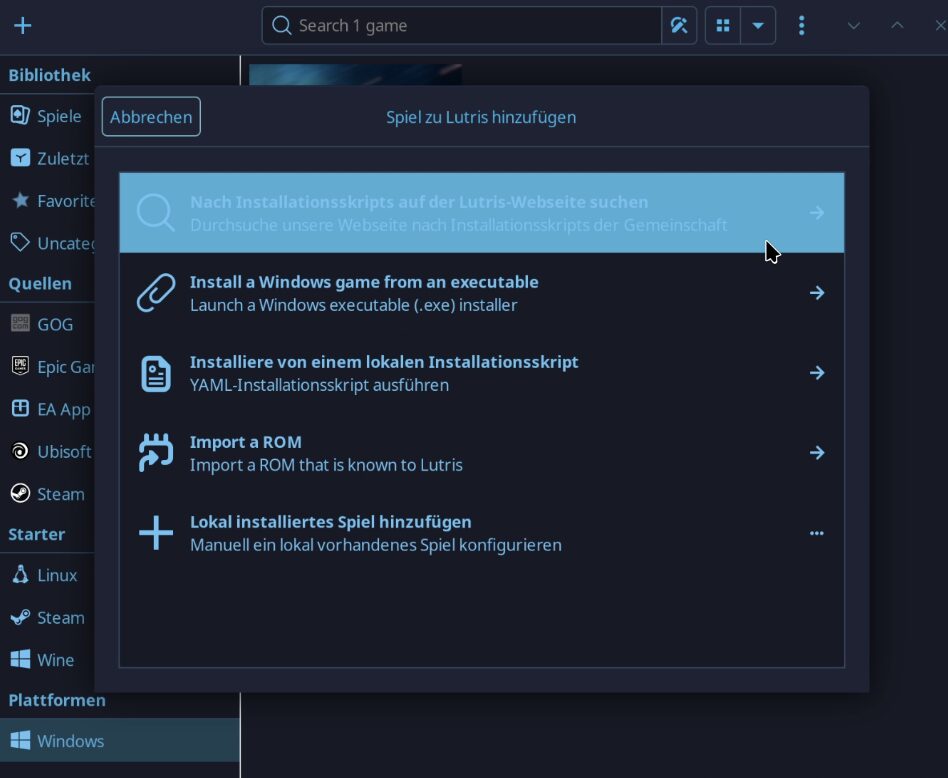
- Start Lutris
- Add new game
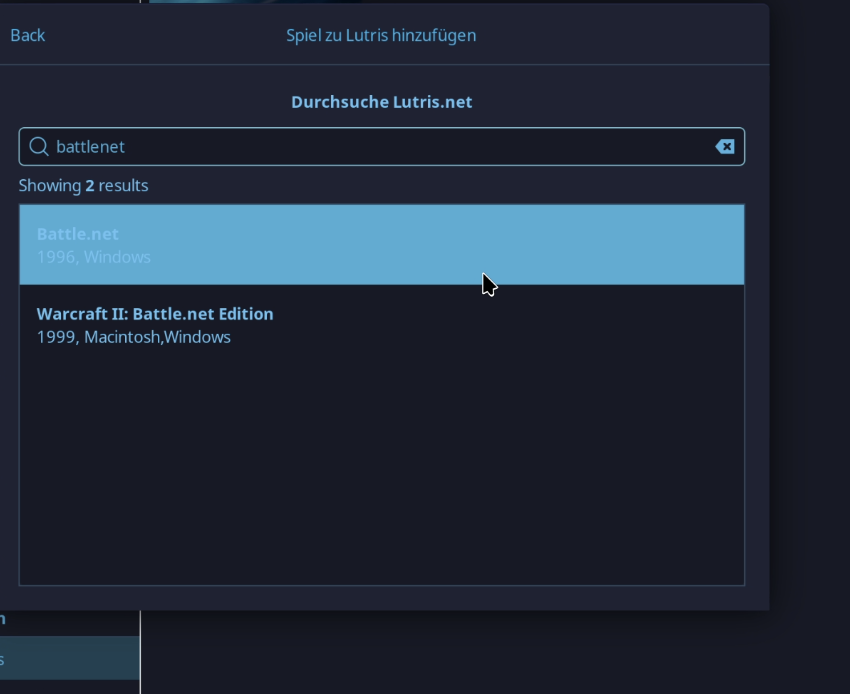
- Search for “battlenet”
- Install (follow the instructions, this is important)
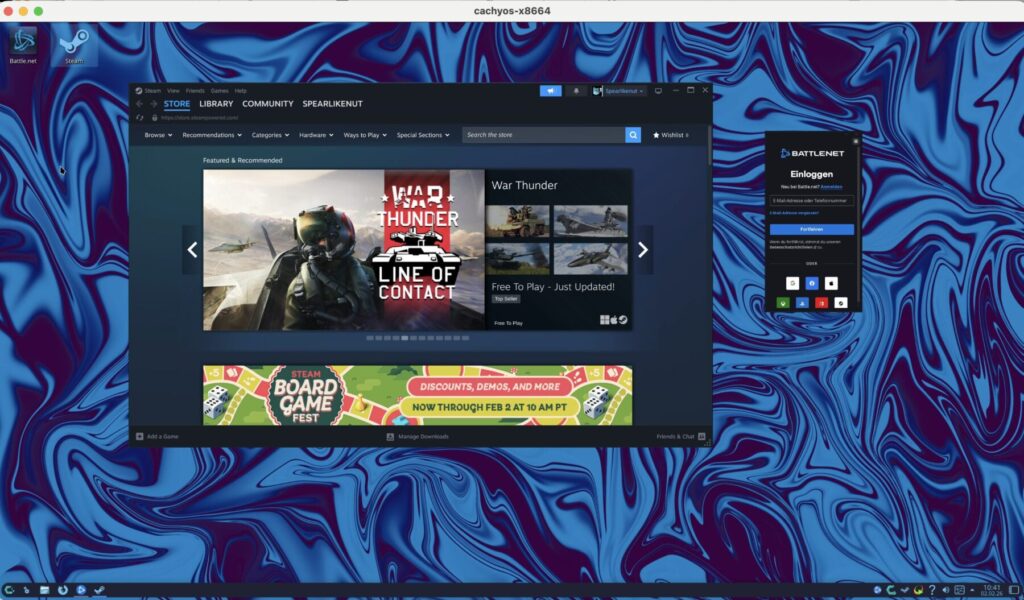
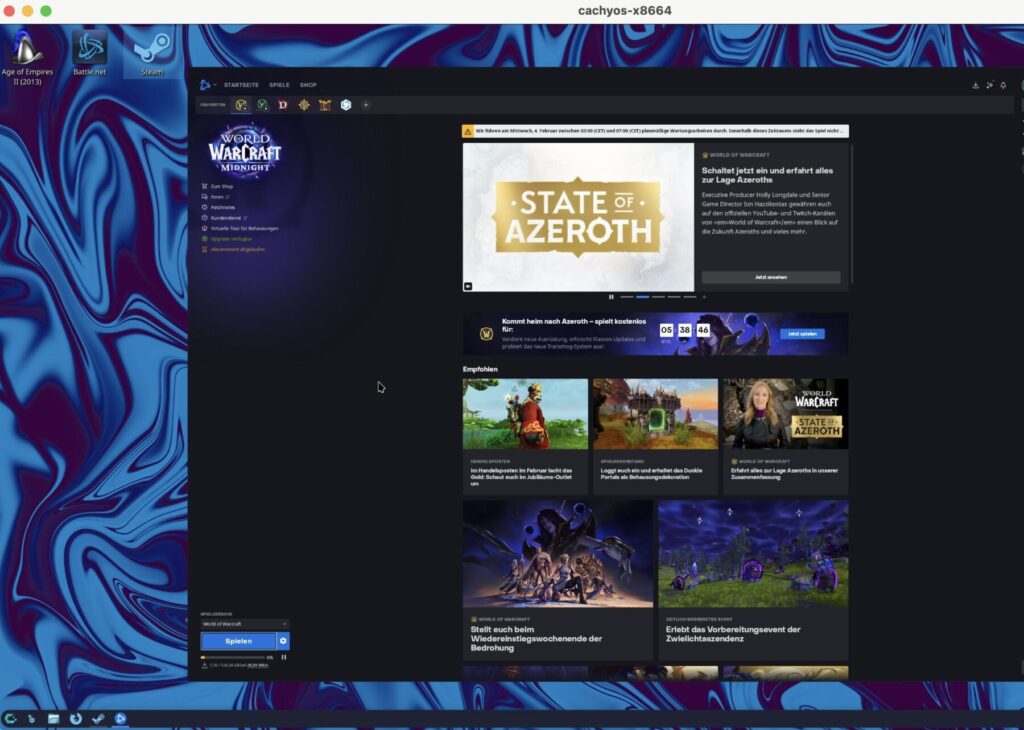
Once installed you need to add Battle.net App into Steam as a
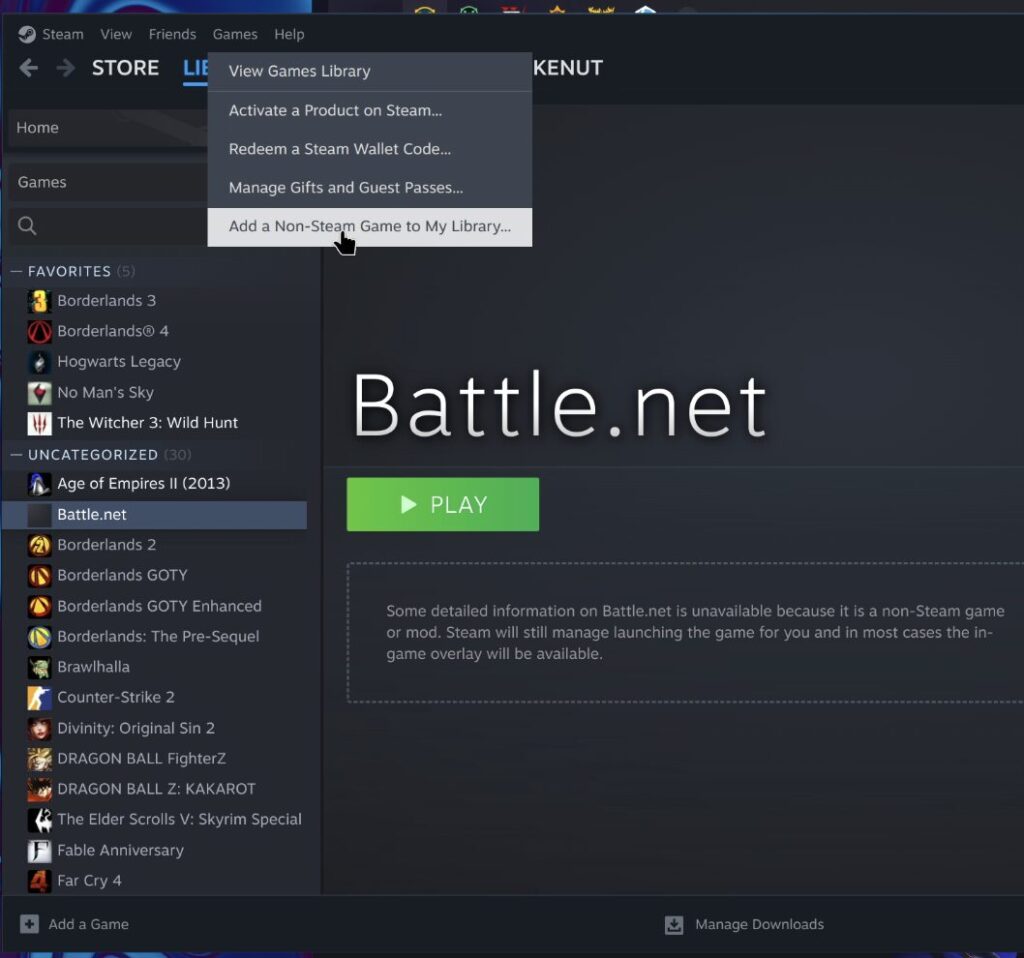
Once you pressed play you can log in to your Battle.net Account and start:
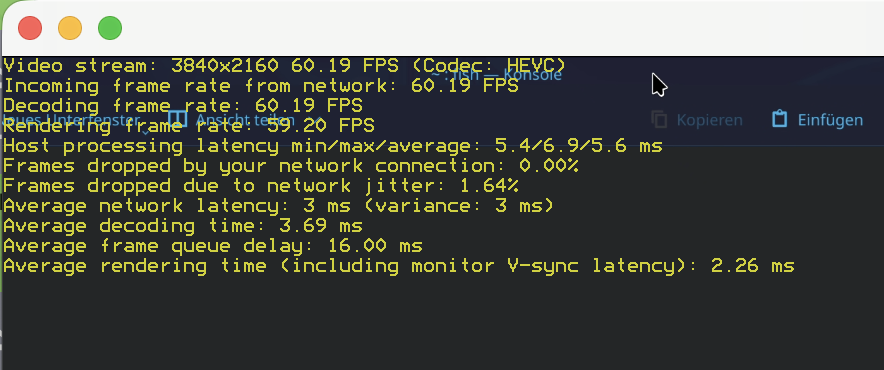
- Resolution: 4K (3840×2160)
- Framerate: Solid 60 FPS
- Latency: ~5.6ms Host Processing (Insanely fast!)
- Codec: HEVC (Hardware Encoding working perfectly)
Wrapping Up: The 48-Hour Debugging Marathon
I’m not going to lie to you, this wasn’t a quick “plug-and-play” tutorial. It took me a solid two days of tinkering, debugging, and staring at terminal logs to get this setup from “broken mess” to a high-performance cloud gaming beast.
We battled through Proxmox hooks, fought against dependency hell, and wrestled with Vulkan drivers until everything finally clicked.
I honestly hope this post acts as the shortcut I wish I had. If this guide saves you even just an hour of the headaches I went through, then every second of my troubleshooting was worth it.
And if you’re still stuck? Just know that we have suffered together, and you are not alone in the Linux trenches! 😂
For my next experiment, I think I’m going to give Bazzite a spin. I’ve heard great things about its “out-of-the-box” simplicity and stability. But let’s be real for a second: Bazzite isn’t Arch-based. If I switch, I lose the sacred ability to drop “I use Arch, btw” into casual conversation, and I’m not sure I’m emotionally ready to give up those bragging rights just yet.
Anyway, thank you so much for sticking with me to the end of this guide. You made it!
Love you, cutiepie! ❤️ Byyyeeeeeeeee!