Disclaimer:
The information provided on this blog is for educational purposes only. The use of hacking tools discussed here is at your own risk.
For the full disclaimer, please click here.
Introduction
Welcome back to the second installment of our exploration into Certspotter and the world of passive reconnaissance. In Part 1, we laid the groundwork for understanding the significance of Certspotter as a vital tool in monitoring certificate transparency logs. We delved into the nuances of passive reconnaissance, highlighting the importance of discreet operations in gathering intelligence without alerting targets.
Now, in Part 2, we’re ready to dive even deeper. Building upon the foundation established in Part 1, we’ll explore advanced techniques for leveraging Certspotter’s capabilities to their fullest potential. Our focus will be on enriching the data obtained from Certspotter and enhancing our reconnaissance efforts through the integration of additional tools and methodologies.
Join me as I uncover the untapped potential of Certspotter and embark on a journey to uncover valuable insights that will inform and empower your hacking strategies. Let’s dive in and elevate our reconnaissance game to new heights.
Data Enrichment
So, you’ve already gathered a wealth of information about your target. But let’s take it a step further.
Here’s what you want to know:
- What’s running on the new subdomain?
- Any interesting paths?
- Open ports?
- Can we capture a screenshot?
- Are there any potential vulnerabilities?
- Perhaps you have a custom target, like specifically testing for WordPress.
Now, there might be a tool out there that handles all these tasks, but I haven’t found it yet. (Feel free to shoot me a message on Signal if you know one). Instead, I’ve decided to build a tool together with you, right here, right now, leveraging ProjectDiscovery’s Tools, which are awesome open-source projects written in one of my favorite languages: Go.
However, as we transition from passive to active reconnaissance, I must reiterate the importance of reading my disclaimer.
Web Technology:
For this task, we’ll use a tool called Webanalyze.
# Installation
go install -v github.com/rverton/webanalyze/cmd/webanalyze@latest

# Update
$HOME/go/bin/webanalyze -update
Now, a quick note: I’m not authorized to recon sandbox.google.com. If, by chance, any of my tools cause a denial of service state on the endpoint, I might be held liable for damages.
To demonstrate, I whitelisted my IP and scanned my own website:
$HOME/go/bin/webanalyze -host exploit.to -crawl 2
 :: webanalyze        : v0.3.9
 :: workers           : 4
 :: technologies      : technologies.json
 :: crawl count       : 2
 :: search subdomains : true
 :: follow redirects  : false

http://exploit.to (0.6s):
    HSTS,  (Security)
    HTTP/3,  (Miscellaneous)
    Cloudflare,  (CDN)
    Astro, 4.5.2 (Static site generator, JavaScript frameworks)
For further consumption I suggest using -output json and storing it locally or sending it to your central system.
Screenshot
For this task, we’ll utilize playwright. While some might argue that this is overkill, I have some future plans in mind. You can learn more about playwright here.
npm init playwright@latestSimply respond with “yes” to all the prompts, as having a positive attitude is always beneficial.
Below is a script that captures a full-page screenshot and lists all the network calls made by a loaded page:
const { chromium } = require("playwright");

(async () => {
  // Launch browser
  const browser = await chromium.launch();

  // Create a new page
  const page = await browser.newPage();

  // Enable request interception
  await page.route("**", (route) => {
    console.log(route.request().url());
    route.continue();
  });

  // Navigate to the desired page
  await page.goto("https://exploit.to");

  // Take a full-page screenshot
  await page.screenshot({ path: "exploit.png", fullPage: true });

  // Close the browser
  await browser.close();
})();
Here’s how you can run the script and check its output:
sudo node screenshot.js

https://exploit.to/
https://exploit.to/_astro/styles.DS6QQjAg.css
https://exploit.to/_astro/hoisted.DfX8MIxs.js
https://exploit.to/_astro/page.BZ5QGxwt.js
https://exploit.to/_astro/ViewTransitions.astro_astro_type_script_index_0_lang.D0ayWLBG.js
https://exploit.to/_astro/index.Vl7qCdEu.js
https://exploit.to/_astro/CryptoBackground.c9l8WxZ_.js
https://exploit.to/_astro/client.B60e5CTm.js
https://exploit.to/cdn-cgi/challenge-platform/scripts/jsd/main.js
https://exploit.to/_astro/index.LHP-L4Pl.js
https://exploit.to/_astro/index.C3GvvkrT.js
https://exploit.to/_astro/jsx-runtime.BoiYzbTN.js
https://exploit.to/_astro/utils.xgzLAuTe.js
Open Ports
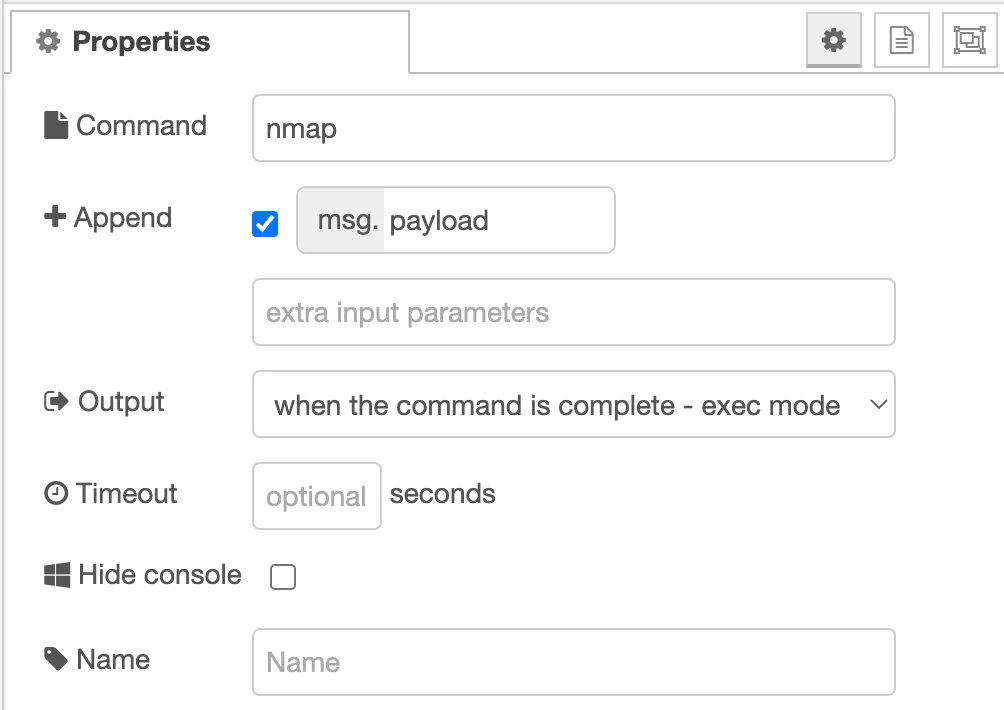
Understanding the open ports on a target system can provide valuable insights into its network architecture and potential vulnerabilities. To accomplish this, we’ll conduct a quick scan using nmap, a powerful network scanning tool.
sudo nmap -sS -Pn -T4 exploit.toThis command initiates a SYN scan (-sS) without host discovery (-Pn) at an aggressive timing level (-T4) against the target exploit.to.
Here’s a breakdown of the scan results:
Starting Nmap 7.94SVN ( https://nmap.org ) at 2024-03-25 15:14 CET
Nmap scan report for exploit.to (IP)
Host is up (0.10s latency).
Other addresses for exploit.to (not scanned): IP
Not shown: 996 filtered tcp ports (no-response)
PORT     STATE SERVICE
80/tcp   open  http
443/tcp  open  https
8080/tcp open  http-proxy
8443/tcp open  https-alt

Nmap done: 1 IP address (1 host up) scanned in 8.17 seconds
The scan reveals the following open ports:
- Port 80/tcp: Open for HTTP.
- Port 443/tcp: Open for HTTPS.
- Port 8080/tcp: Open for HTTP proxy.
- Port 8443/tcp: Open for alternate HTTPS.
Subdomains
Exploring subdomains can uncover hidden entry points and potential vulnerabilities within a target’s infrastructure. Let’s leverage Subfinder for passive subdomain enumeration and HTTPX for validation.
go install -v github.com/projectdiscovery/httpx/cmd/httpx@latest

go install -v github.com/projectdiscovery/subfinder/v2/cmd/subfinder@latest
You can easily pipe the output of subfinder to httpx for further analysis:
$HOME/go/bin/subfinder -d sandbox.google.com | $HOME/go/bin/httpx -status-code -title -tech-detectHere’s a basic setup, but you can fine-tune these flags extensively. Additionally, I recommend integrating free API Keys to enhance subdomain discovery.
In our hypothetical Google case, here are some findings:
https://ecc-test.sandbox.google.com [200] [ECC-capable Certificate Success] [HTTP/3]
https://dry.sandbox.google.com [404] [Error 404 (Not Found)!!1] [HTTP/3]
https://during.sandbox.google.com [404] [Error 404 (Not Found)!!1] [HTTP/3]
https://earth.sandbox.google.com [404] [Error 404 (Not Found)!!1] [HTTP/3]
https://cert-test.sandbox.google.com [200] [Test Success] [HTTP/3]
https://dynamite-preprod.sandbox.google.com [302] [] [HSTS,HTTP/3]
The tech detection capabilities are surprisingly robust. In my earlier site example, the results were as follows:
https://exploit.to [200] [Karl Machleidt | Cyber Security Expert] [Astro:4.5.2,Cloudflare,HSTS,HTTP/3]Paths
Now, let’s delve into fuzzing some paths. While tools like Gobuster can handle both subdomain enumeration and directory enumeration, I’d like to showcase some different tools for this task.
For the wordlist, we’ll use Daniel Miessler’s SecLists common.txt.
gobuster dir --useragent "EXPLOIT.TO" --wordlist "common.txt" --url https://exploit.toHere’s a breakdown of the Gobuster scan results:
===============================================================
Gobuster v3.6
by OJ Reeves (@TheColonial) & Christian Mehlmauer (@firefart)
===============================================================
[+] Url:                     https://exploit.to
[+] Method:                  GET
[+] Threads:                 10
[+] Wordlist:                common.txt
[+] Negative Status codes:   404
[+] User Agent:              EXPLOIT.TO
[+] Timeout:                 10s
===============================================================
Starting gobuster in directory enumeration mode
===============================================================
/.git/index           (Status: 308) [Size: 0] [--> /.git/]
/.well-known/http-opportunistic (Status: 200) [Size: 21]
/404                  (Status: 200) [Size: 17047]
/about                (Status: 308) [Size: 0] [--> /about/]
/blog                 (Status: 308) [Size: 0] [--> /blog/]
/contact              (Status: 308) [Size: 0] [--> /contact/]
/disclaimer           (Status: 308) [Size: 0] [--> /disclaimer/]
/feed                 (Status: 301) [Size: 0] [--> https://exploit.to/rss.xml]
/index                (Status: 308) [Size: 0] [--> /]
/index.html           (Status: 308) [Size: 0] [--> /]
/robots.txt           (Status: 200) [Size: 57]
/rss                  (Status: 301) [Size: 0] [--> https://exploit.to/rss.xml]
/search               (Status: 308) [Size: 0] [--> /search/]
/tags                 (Status: 308) [Size: 0] [--> /tags/]
/tools                (Status: 308) [Size: 0] [--> /tools/]
Progress: 4727 / 4727 (100.00%)
===============================================================
Finished
===============================================================
These results provide insights into various paths on the target site, facilitating potential avenues for further exploration and potential vulnerabilities.
Vulnerabilities
Vulnerability scanners are notorious for their loud presence, and we have several options at our disposal:
For this demonstration, I’ll opt for Nuclei, which simplifies custom discovery tasks significantly.
To install Nuclei, execute the following command:
go install -v github.com/projectdiscovery/nuclei/v3/cmd/nuclei@latestUsing Nuclei without specifying templates to use can generate excessive traffic. Here’s an example command specifying templates:
$HOME/go/bin/nuclei -target exploit.to -t http/cves/ -t sslRunning Nuclei with all available templates can uncover a plethora of issues. However, be cautious, as this scan can be aggressive. Here’s an example scan of my website. Note that running such a scan on unauthorized targets is not recommended:
[nameserver-fingerprint] [dns] [info] exploit.to [jonah.ns.cloudflare.com.,uma.ns.cloudflare.com.]
[caa-fingerprint] [dns] [info] exploit.to
[dmarc-detect] [dns] [info] _dmarc.exploit.to ["v=DMARC1; p=reject; sp=reject; adkim=s; aspf=s; rua=mailto:[email protected];"]
[mx-fingerprint] [dns] [info] exploit.to [54 route1.mx.cloudflare.net.,84 route2.mx.cloudflare.net.,98 route3.mx.cloudflare.net.]
[txt-fingerprint] [dns] [info] exploit.to ["v=spf1 include:_spf.mx.cloudflare.net ~all"]
[spf-record-detect] [dns] [info] exploit.to [v=spf1 include:_spf.mx.cloudflare.net ~all"]
[dns-waf-detect:cloudflare] [dns] [info] exploit.to
[INF] Using Interactsh Server: oast.fun
[addeventlistener-detect] [http] [info] https://exploit.to
[xss-deprecated-header] [http] [info] https://exploit.to [1; mode=block]
[metatag-cms] [http] [info] https://exploit.to [Astro v4.5.2]
[tech-detect:cloudflare] [http] [info] https://exploit.to
[http-missing-security-headers:content-security-policy] [http] [info] https://exploit.to
[http-missing-security-headers:permissions-policy] [http] [info] https://exploit.to
[http-missing-security-headers:x-permitted-cross-domain-policies] [http] [info] https://exploit.to
[http-missing-security-headers:clear-site-data] [http] [info] https://exploit.to
[http-missing-security-headers:cross-origin-embedder-policy] [http] [info] https://exploit.to
[http-missing-security-headers:cross-origin-opener-policy] [http] [info] https://exploit.to
[http-missing-security-headers:cross-origin-resource-policy] [http] [info] https://exploit.to
[robots-txt-endpoint] [http] [info] https://exploit.to/robots.txt
[waf-detect:cloudflare] [http] [info] https://exploit.to/
[ssl-issuer] [ssl] [info] exploit.to:443 [Google Trust Services LLC]
[ssl-dns-names] [ssl] [info] exploit.to:443 [exploit.to]
Let’s break down some of the identified vulnerabilities from the Nuclei scan results:
- nameserver-fingerprint [dns]: This vulnerability detection identifies the nameservers associated with the domain
exploit.to, revealing that it is using Cloudflare’s nameservers (jonah.ns.cloudflare.comanduma.ns.cloudflare.com). While not necessarily a vulnerability, this information can be useful for reconnaissance purposes. - caa-fingerprint [dns]: This indicates the absence of CAA (Certificate Authority Authorization) records for the domain
exploit.to. CAA records specify which certificate authorities are allowed to issue certificates for a domain. Lack of CAA records might imply less control over certificate issuance, potentially leaving the domain vulnerable to unauthorized certificate issuance. - dmarc-detect [dns]: This detection reveals the DMARC (Domain-based Message Authentication, Reporting, and Conformance) policy for the domain
_dmarc.exploit.to. The policy specifies how a receiving mail server should handle emails that fail SPF (Sender Policy Framework) and DKIM (DomainKeys Identified Mail) checks. In this case, the policy is set to “reject,” indicating strict handling of failed authentication, which is generally considered good practice. - mx-fingerprint [dns]: This vulnerability detection identifies the mail servers (MX records) associated with the domain
exploit.to, which are provided by Cloudflare. While not necessarily a vulnerability, this information can be useful for understanding the email infrastructure associated with the domain. - txt-fingerprint [dns]: This reveals the SPF (Sender Policy Framework) record for the domain
exploit.to, specifying which servers are allowed to send emails on behalf of the domain. The record indicates that emails should be sent only from servers included in the_spf.mx.cloudflare.netinclude mechanism. - waf-detect:cloudflare [http]: This detection indicates the presence of a WAF (Web Application Firewall) provided by Cloudflare for the domain
exploit.to. WAFs help protect web applications from common security threats such as SQL injection, cross-site scripting (XSS), and DDoS attacks. - ssl-issuer [ssl]: This reveals information about the SSL certificate issuer for the domain
exploit.to, which is Google Trust Services LLC. SSL certificates issued by reputable authorities help establish secure HTTPS connections, ensuring data transmitted between the user’s browser and the web server remains encrypted and secure.
These are just a few examples of the vulnerabilities and configurations identified in the Nuclei scan results. Each of these findings provides valuable insights into potential security risks and areas for improvement in the domain’s infrastructure and configuration.
Custom
Now, let’s illustrate a simple example:
$HOME/go/bin/nuclei -target exploit.to -t http/honeypot/elasticpot-honeypot-detect.yamlImagine you’re interested in scanning for Elastipot, Elasticsearch honeypots. Identifying these honeypots beforehand can be crucial before launching any new zero-day attack on open Elasticsearch instances. While creating custom templates for such detections isn’t overly complicated, it allows you to tailor detection scripts to your specific needs. Alternatively, you can employ Gobuster, as mentioned earlier, to test for specific paths.
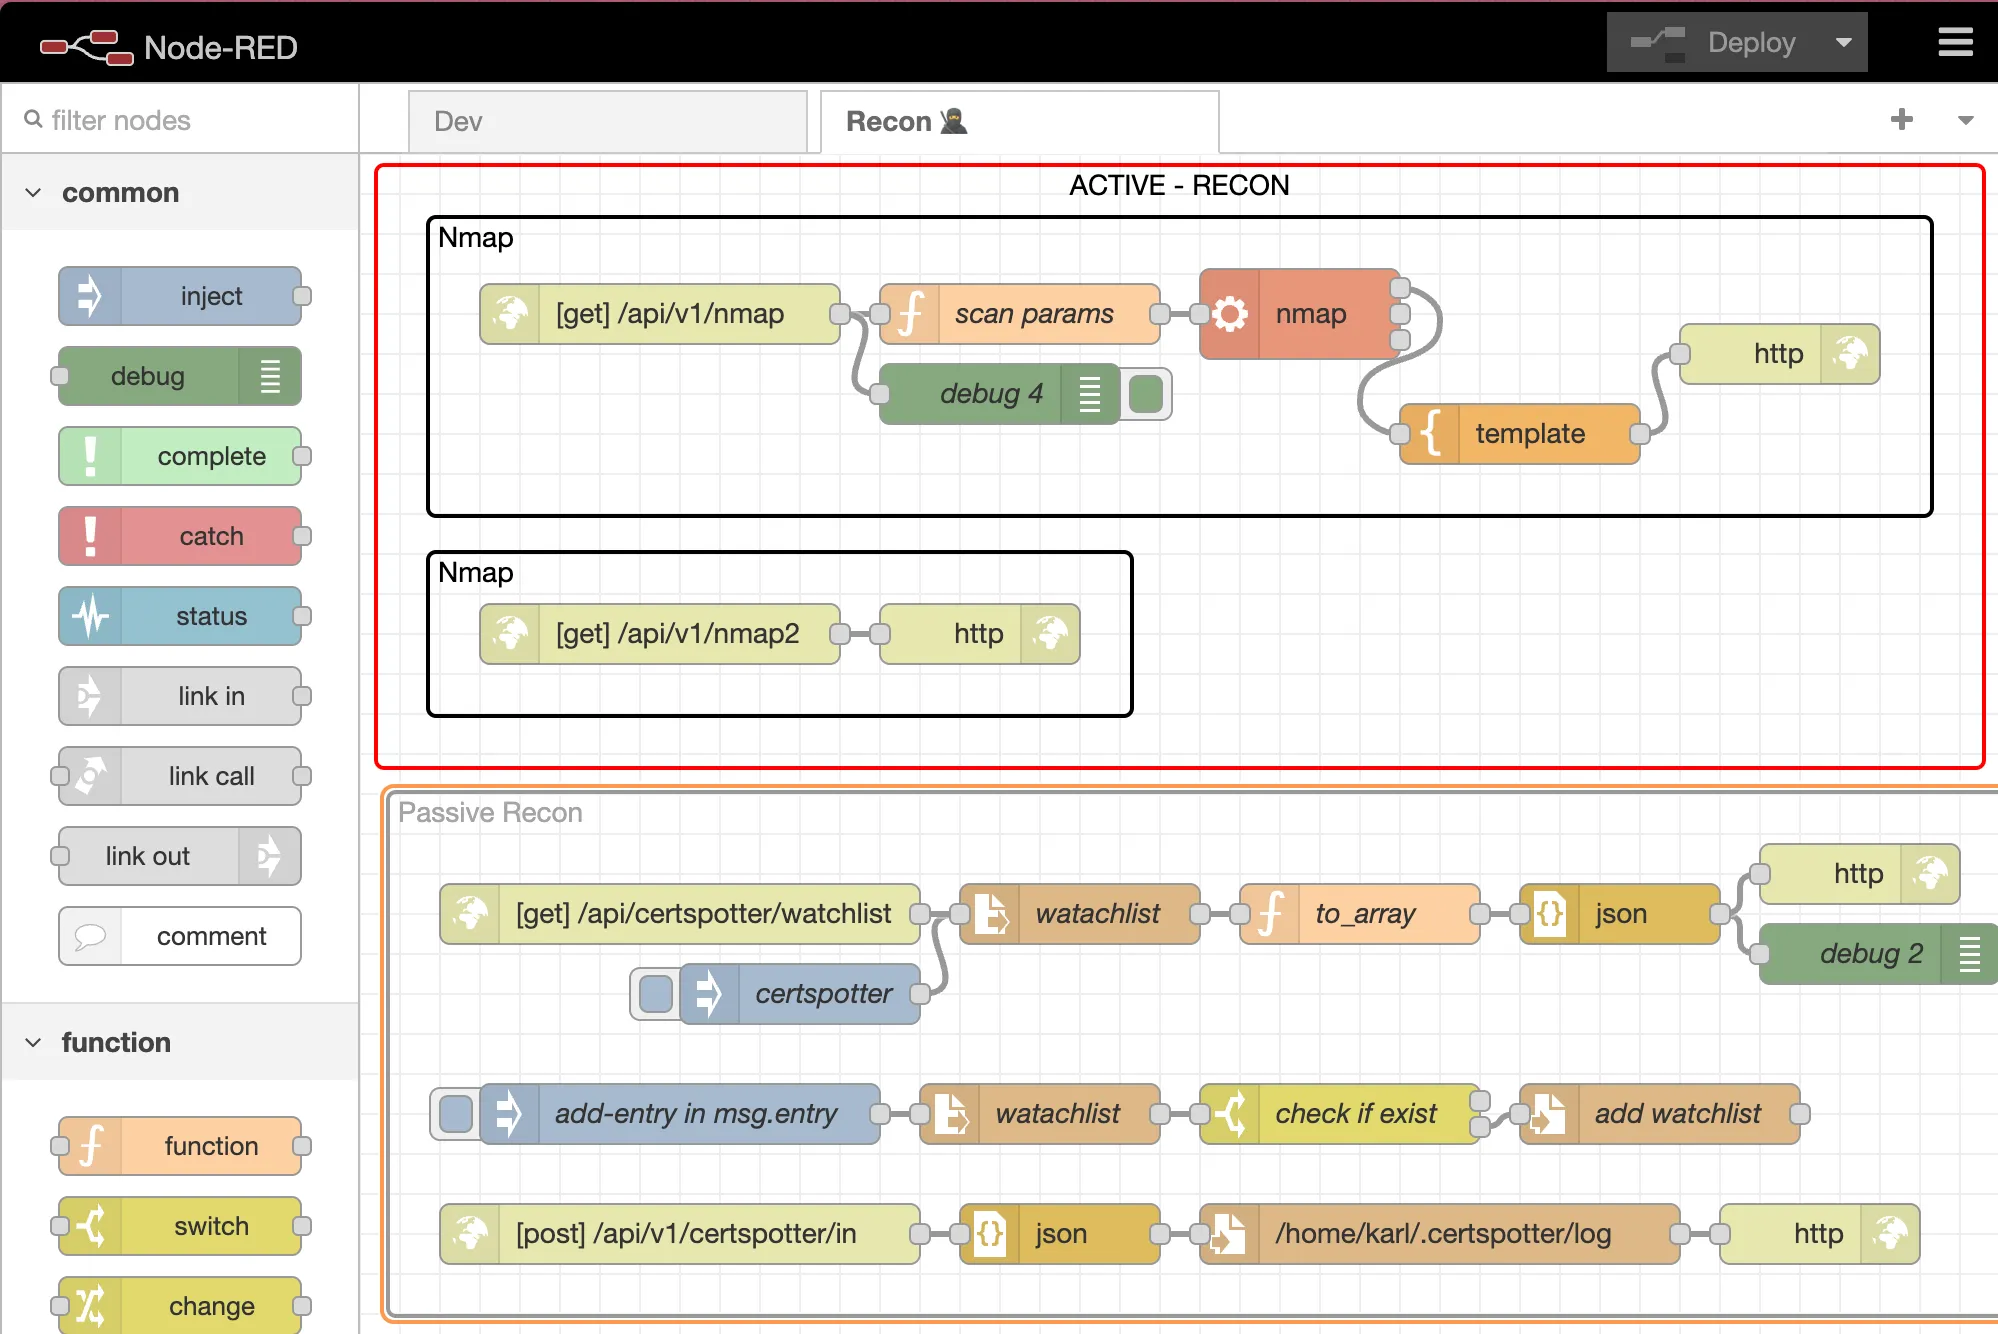
Recon Data
We’ve successfully gathered all the desired data:
- Identification of services running on new subdomains.
- Open ports analysis.
- Screenshot capture.
- Discovery of interesting paths.
- Identification of possible vulnerabilities.
- Custom targeting, such as explicit testing for WordPress.
We now know that our target is developing a new project, the technolgies used, possible vulnerabilities, interesting paths, have a screenshot and more.
Summary
We explored various reconnaissance techniques, from subdomain enumeration and directory scanning to vulnerability assessments and customized detections. Leveraging tools like Certspotter, Gobuster, Nuclei, and others, we gained profound insights into our target’s infrastructure and potential security vulnerabilities.
Our adventure began with an introduction to Certspotter, the pioneer in certificate transparency log monitoring. We dissected the significance of passive reconnaissance, emphasizing its discreet nature compared to active methods. With Certspotter, we learned how to continuously monitor for new subdomains and certificate registrations, all at minimal cost.
From envisioning scenarios of seizing control over freshly set up WordPress sites to stealthily infiltrating default credentials in Grafana or Jenkins installations, the possibilities for mischief are boundless. Armed with our newfound knowledge and toolkit, the next logical step involves automating these processes and integrating them into a centralized system for ongoing monitoring and analysis.
I am working on a Part 3. In the next part I want to combine all the tools to one final script that should be triggered whenever certspotter finds a new certificate:
- run dnsx
- run subfinder and httpx if wildcard else run httpx
- use playwright for screenshot and network traffic
- port scan
- maybe use httpx for path ? Otherwise gobuster Should also run alone based on domain, wildcard or subdomain input.
I want the output to be one final JSON I can then render on my website.


 I did not show you my DNS Server IP by mistake. Scroll to the end to find out why.