Everywhere you go right now, you will encounter AI and people writing about AI. Personally, I am kind of tired of it, but once in a while, I get a tingly feeling that maybe this could actually be useful.
Since my main income is hacking and protecting people from getting hacked, I figured let’s see how far the “AI Hackers” really are. I fired up my Claude console, bought 250€ worth of API credits, and decided to do some real-world testing.
When you google “AI Pentest Github,” you will inevitably come across three main open-source AI security agents: PentAGI, Strix, and Xalgorix. Instead of relying on vendor promises, I wanted to see if these multi-agent workflows could actually find and exploit real vulnerabilities. In this post, I am breaking down my entire journey, the API costs, and why I think commercial scanners might be in serious trouble.
The Setup: No Labs, Just Real-World Targets
Pointing an AI pentester to a lab environment was kind of boring and a waste of credits, so I figured let’s do some real-world hackery (please don’t sue).
My first target was my employer. (Take that, entity I am not allowed to name here! I am joking, I have written permission to do this.) After that, I pointed the agents at some public bug bounties to see if I could get my money’s worth.
To set the scope, I basically copied the entire bug bounty page, because reading is for nerds, pasted it into Gemini, and told it to generate a highly specific scoping prompt for an AI pentest agent.
For hardware I used my home server and spun up a Debian 13 LXC with Docker and Docker Compose installed, nothing fancy:
- 4 Cores
- 4GB RAM
- 100GB Storage
Meet the AI Pentesting Agents: PentAGI, Strix, and Xalgorix
To give you the short version of how these tools compare:
- Xalgorix: This tool underdelivered hard. On paper, it looks great with its massive toolset, but in practice, it kept looping. The UI was buggy, and I didn’t really get anything useful out of it.
- Strix: Annoyingly, you always need the source code to run tests with Strix. Yes, whitebox testing can be super useful, but I wanted to take a pure blackbox approach.
- PentAGI: This was exactly what I was looking for, and it actually delivered. Because it was the clear winner, it will be the main focus of this post.


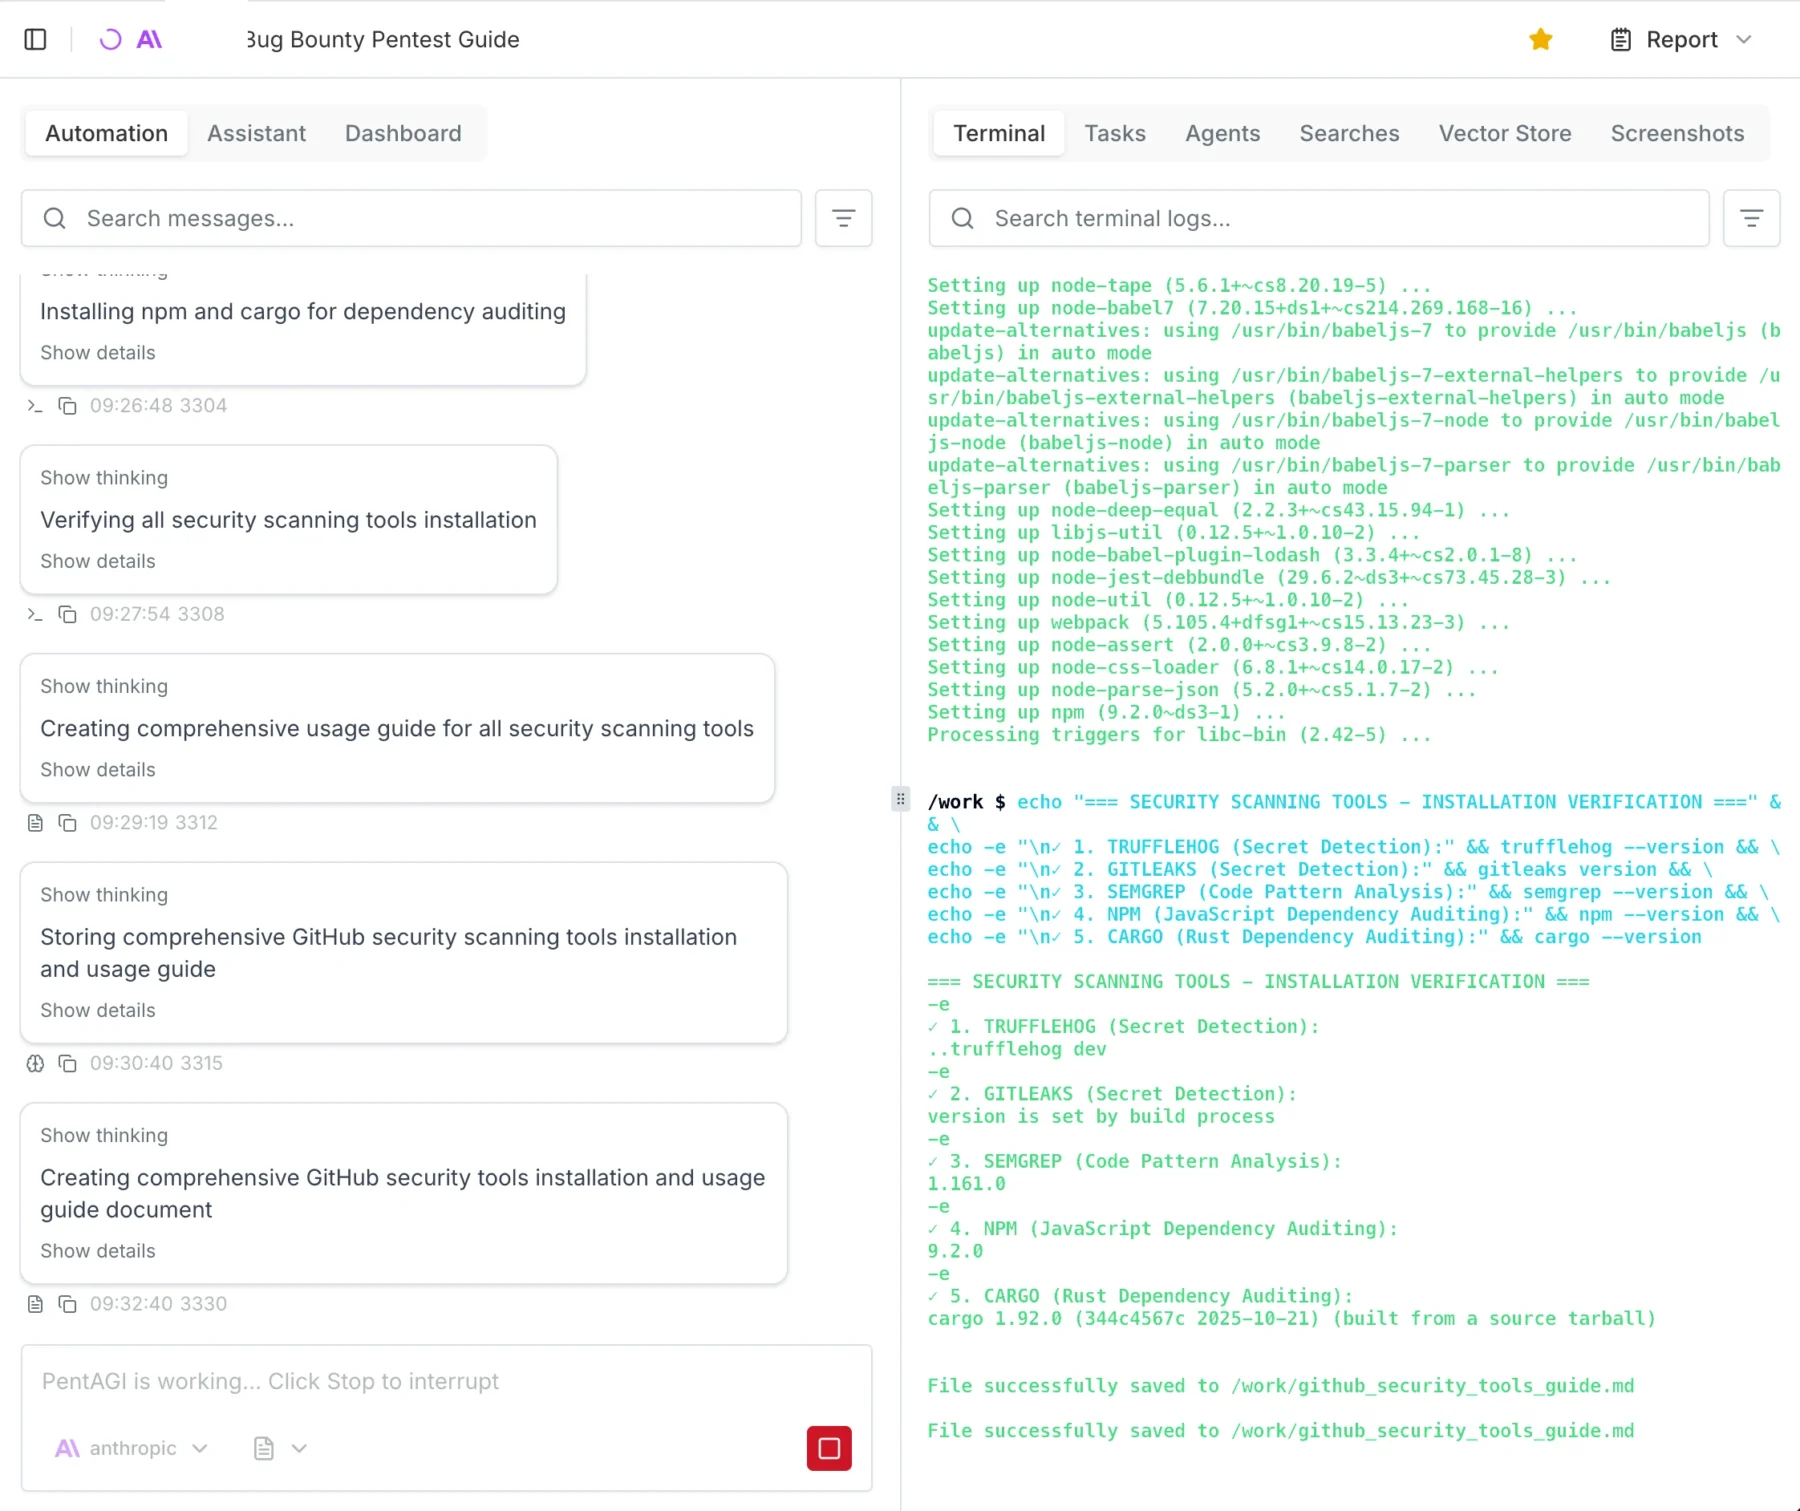
Spinning up PentAGI
Installing PentAGI was so easy I won’t really go into detail here. It is literally a 3-step process: run command, press enter, log in, go.
Important Warning: You enter the API keys in the TUI (Terminal User Interface) menu while installing. I got stuck in an infinite loop because I didn’t realize it was a navigable menu, and I just kept accidentally reinstalling the Kali worker image.
I spun up a Debian 13 LXC on my Proxmox server. The recommended specs are:
- Docker and Docker Compose
- Minimum 2 vCPU
- Minimum 4GB RAM
- 20GB free disk space
However, I gave it 100GB of disk space, and I highly recommend you give it more resources too. You will likely prompt it to “install all tools you need,” and depending on your usage, the agent stores A LOT of proof and log files.
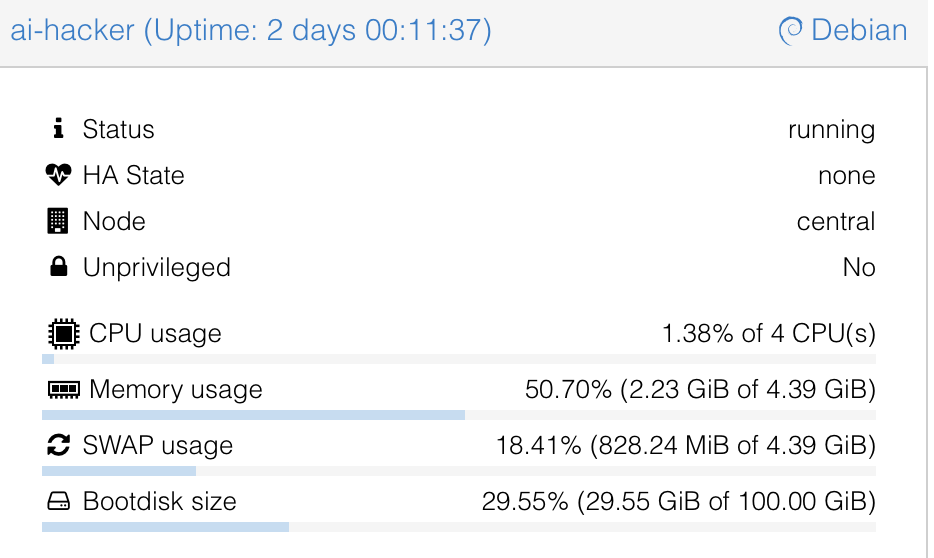

Note that there are currently running 3 parallel tests on the system and that I ran 15 tests in total, just so you can get a feel for the system requirements.
OpenAI vs. Claude: Which “Brain” Hacks Better?
This is going to be a really short section. Claude wins. Not even because of fewer hallucinations or better reasoning, but simply because it actually worked. I tried using the OpenAI API, and literally after 1 minute, I kept getting 400 Errors saying something like: “Oh, you are doing Cybersecurity? Then you must sign up for trusted access.“ They kept blocking my requests, which was superbly annoying.
Claude, on the other hand, just did it. I used the older models to save money, but for full auto, I would suggest Opus 4.7. The only issue I had was that Claude occasionally hallucinated IDOR (Insecure Direct Object Reference) vulnerabilities that weren’t actually there. A simple “Show me the proof” prompt helped get it back on track.

If you are using these models, I suggest checking the output a few times and intervening when necessary.
The Results: Hallucinations, Triumphs, and Fails
When the dust settled and the credits were spent, what did PentAGI actually hand over?
First, let’s talk about the deliverables. PentAGI outputs reports in either Markdown or PDF. My advice? Skip the PDF. It is not well formatted. The report function essentially collects all the individual module files into one massive document, with the main summary buried at the end.
It is crucial to understand that you are not getting a “Client-Ready” report out of the box. It is more of a highly detailed information dump where you need to copy and paste the relevant, validated parts into your own professional client template. That said, PentAGI is highly configurable. Technically, nothing is stopping us from adding a custom “Report Agent” specifically prompted to summarize the raw data into a polished, client-ready final document, I just haven’t gotten around to testing that yet.

Battling Hallucinations and Safety Filters
As I mentioned earlier, you have to be mindful of AI hallucinations. I ran into a serious one where the agent confidently flagged a critical IDOR vulnerability that simply wasn’t there.
Getting the AI to verify this was a bit of a battle. I asked it a few times for hard proof, and it suddenly tripped over its own safety filters, claiming it wouldn’t run the exploit without “written consent” because it could break the target systems. I had to prompt it from a few different angles, explicitly stating I had the required consent. Ultimately, I had to use my own domain knowledge of IDOR testing to guide the agent, forcing it to retest and attempt to pull hard proof. Once it actually tried, the hallucination was busted.
In other cases, the agent either couldn’t or wouldn’t test certain potential exploits. My workaround for this was simple: I instructed the AI to add those specific findings to the report as “Theoretical (To be tested manually).”
The Triumphs
At the end of the day, this is an AI tool. Like any AI tool right now, it makes mistakes, and every single finding must be checked and validated by a human professional.
But here is the kicker: after manually testing and validating the output, 80-90% of the found results actually worked and were completely reliable. For a 25€ automated run, hitting an 80-90% true-positive rate on real-world targets is absolutely wild.


Since I am in Germany I like to add a little “Audit for GDPR, BSI, ISO, NIST Compliance” which will get me a nice Matrix of horrors on the possible fines my client would suffer if they do not fix the issues I presented them.
The 250€ Bill: Breaking Down the API Costs
By the time of writing, I am still running 3 tests in the background. Each full test costs about 20-30€ in API credits with the models I used.
Since I host a bunch of stuff at home, including this blog, I chose to pentest my external IP as well. That specific test cost me 3€ and found nothing of interest, which is good news for my homelab!
The cool thing about PentAGI is that it tells you exactly where you spent how many tokens and how much it costs so you can really measure and plan how much you will need:

Final Verdict: Are Autonomous Hackers Ready for Production?
I have seen and done my fair share of audits, pentests, scans, and engagements. I have seen better, but I have also seen a lot worse.
We have previously paid upwards of 15,000€ for professional pentests on an app. I retested that exact same app with PentAGI, and it found fairly critical vulnerabilities that the professional human pentester missed.
Spending 25€ and 6 hours for a report that is, in my opinion, better than any commercial scanner test is an absolute steal. Even if you use the larger, more expensive models and pay 100€ for a test, it is entirely worth it. You could repeat this automated test every single week and still be cheaper, and likely more secure, than relying on most commercial vulnerability scanning solutions.
As always, thanks for reading, love you bunches ❤️💅 byeeeeeee